How to use Scenario for Outlook add-in
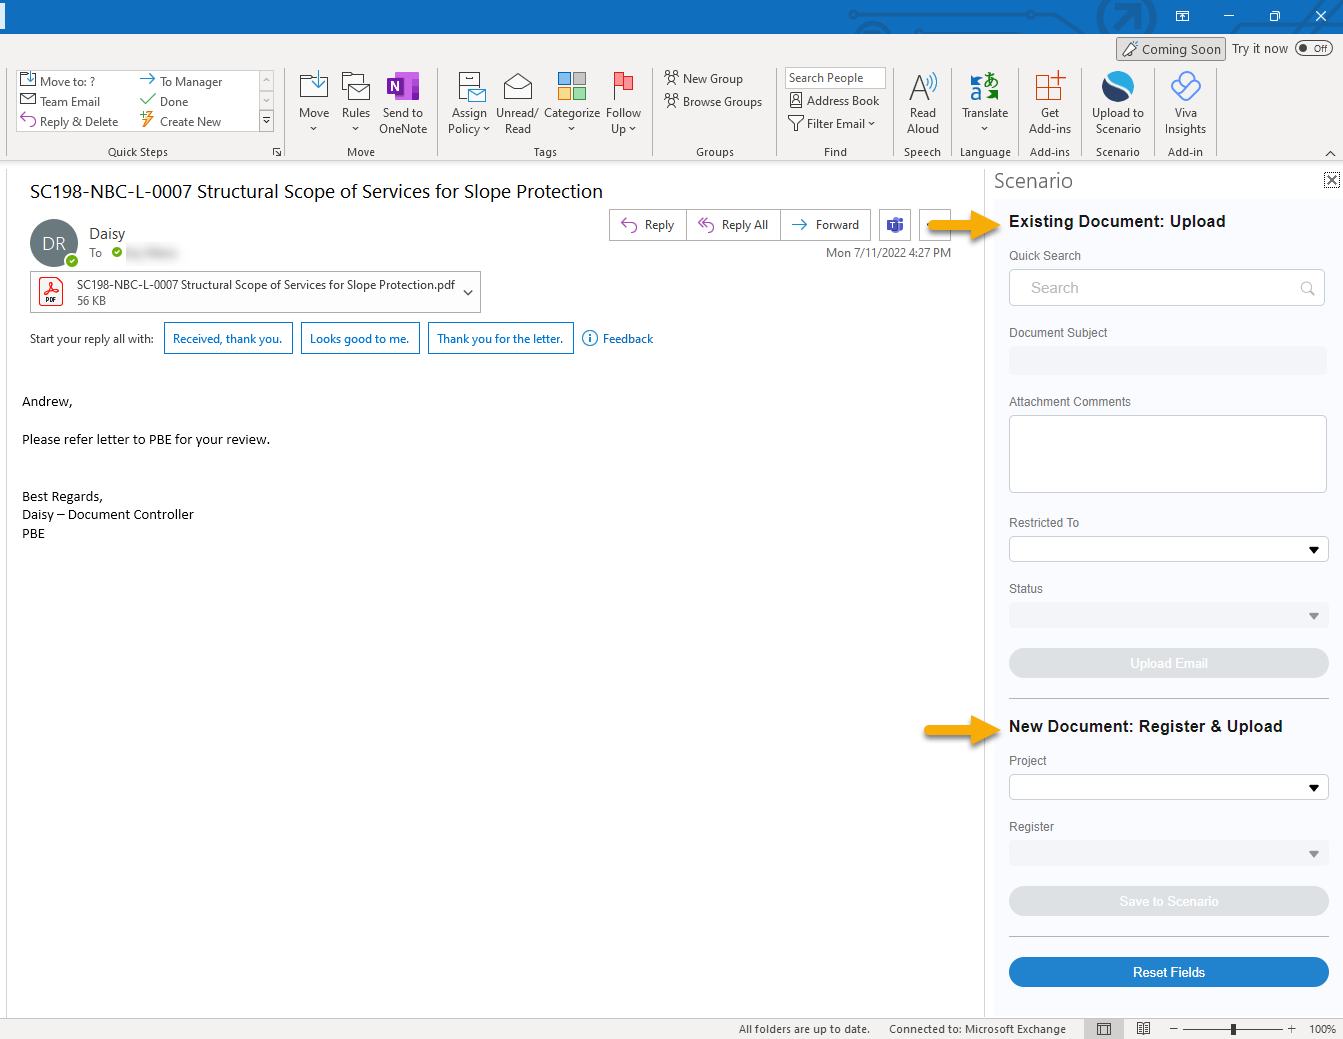
Scenario for Outlook add-in feature uploads your emails in Outlook to Scenario and there are two options:
Existing Document - Upload a selected email to an existing Document
New Document: Register & Upload - Upload a selected email to a new Document
Notes:
The email filename will be truncated to a maximum of 240 characters and invalid characters (such as : or /) are removed due to Windows restrictions.
When uploading an email with attachment files, it is uploaded with an email as well as those attached files separately as Scenario Attachments, e.g. if it has one pdf file attached, there will be two Scenario Attachments uploaded - one is the email, the other is the pdf file.
Uploading an email can only be done to one (1) Email at a time.
Remember, not all Registers will be enabled on Outlook to use this feature.
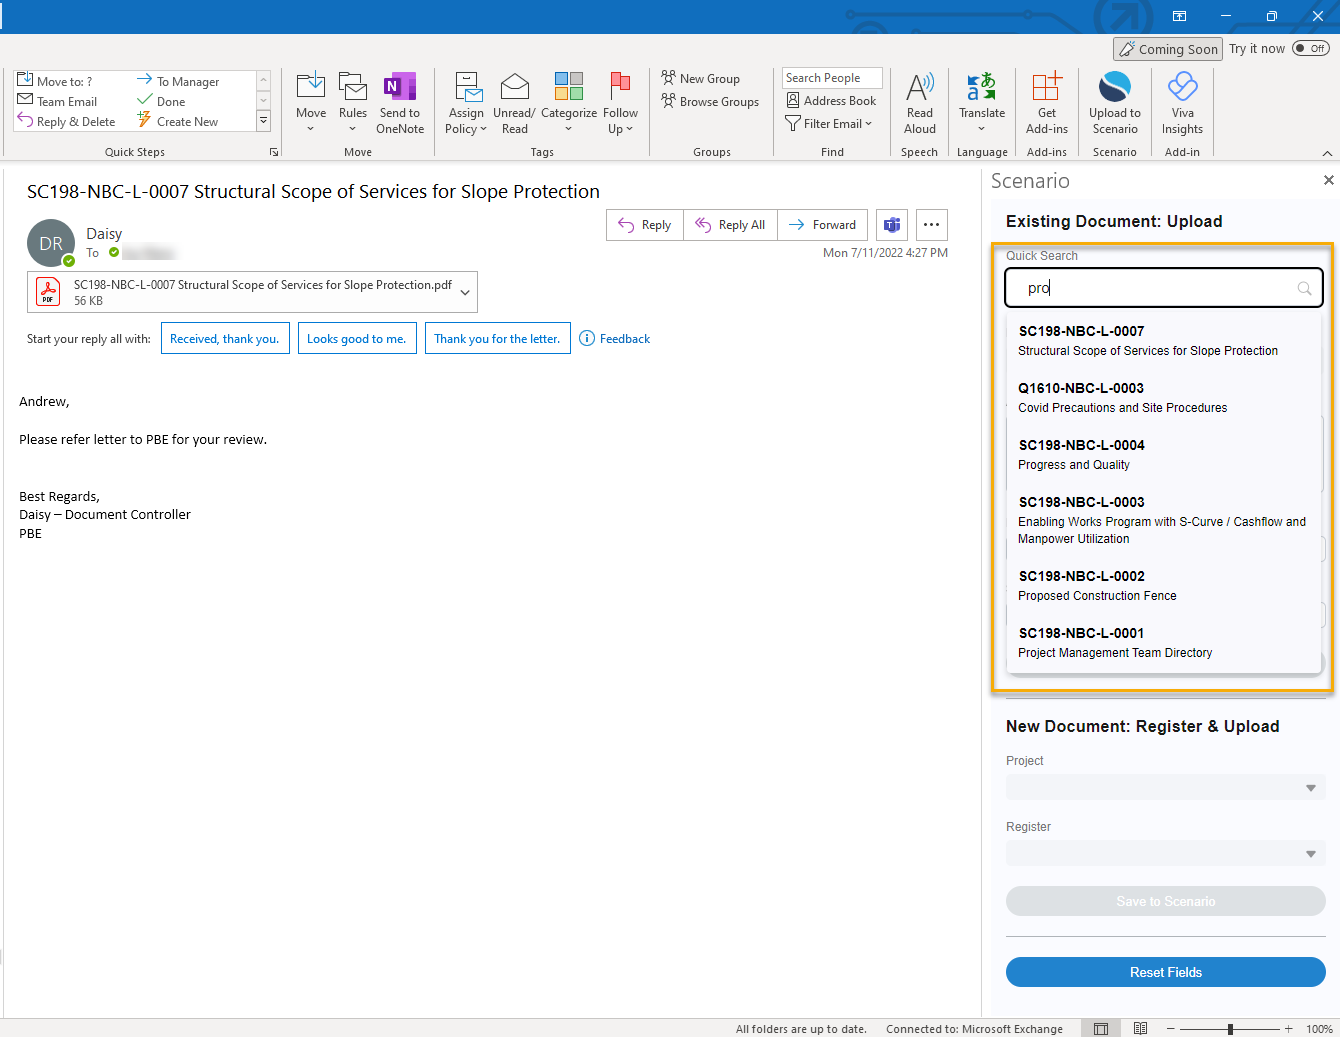
Existing Document Upload Quick Search shows up to the top 10 latest Documents across all projects you have access.
The default timeout is set to 30 minutes. It refreshes the timer when you action within 10 minutes before it expires.
How do I login to Scenario for Outlook add-in
Open an email
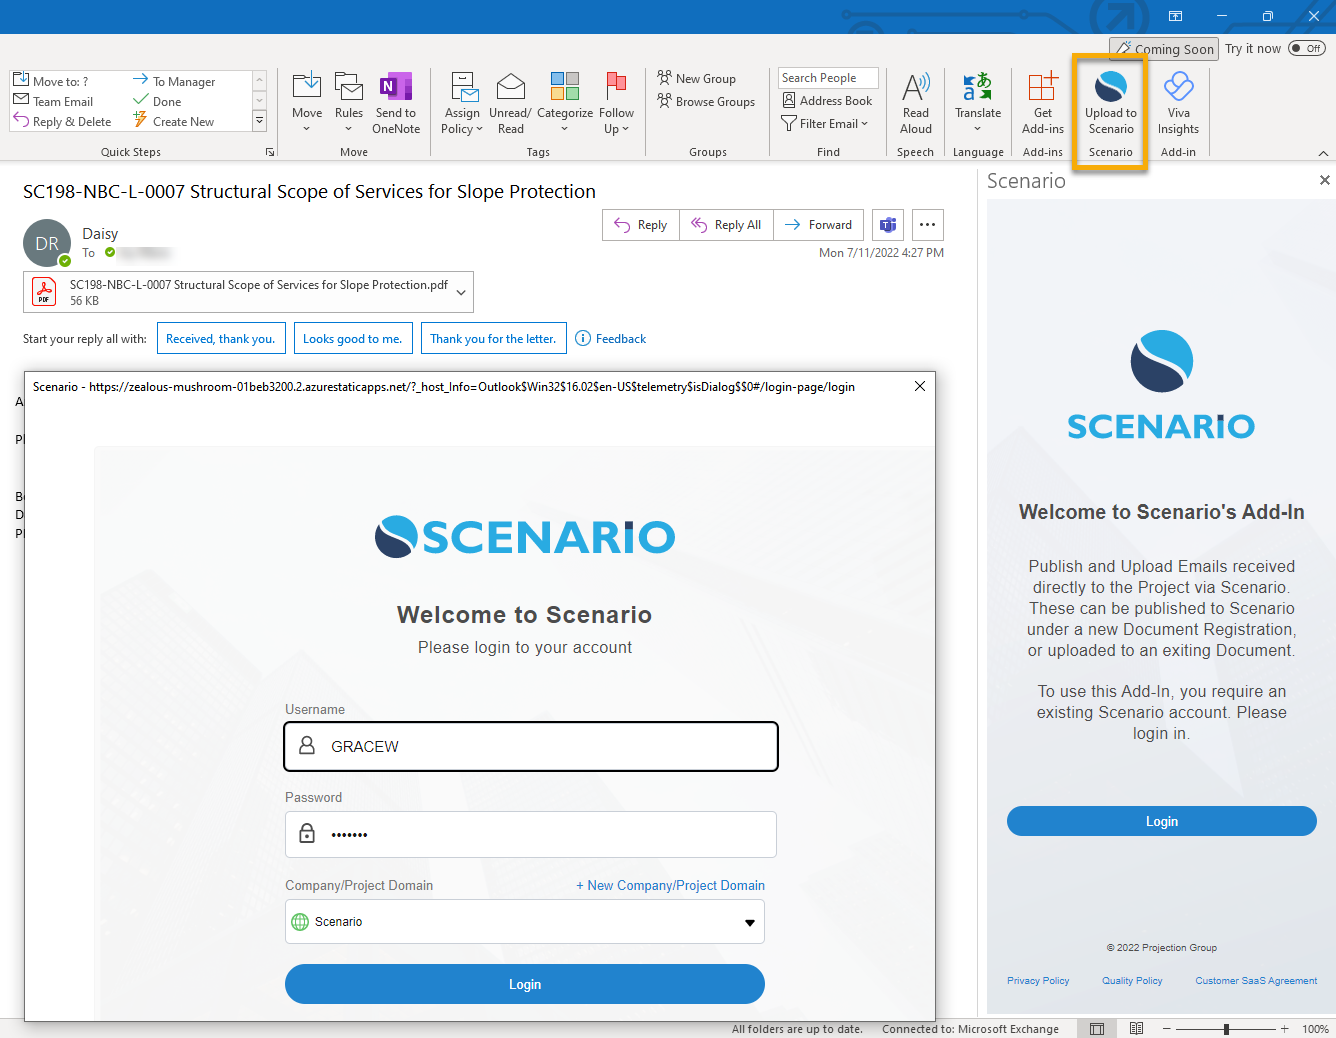
Click Scenario for Outlook add-in

Scenario panel will appear on your selected Email. Click Login
Enter your Scenario Username and Password
For multiple domains only - Select Company/Project Domain to connect with
Click Login
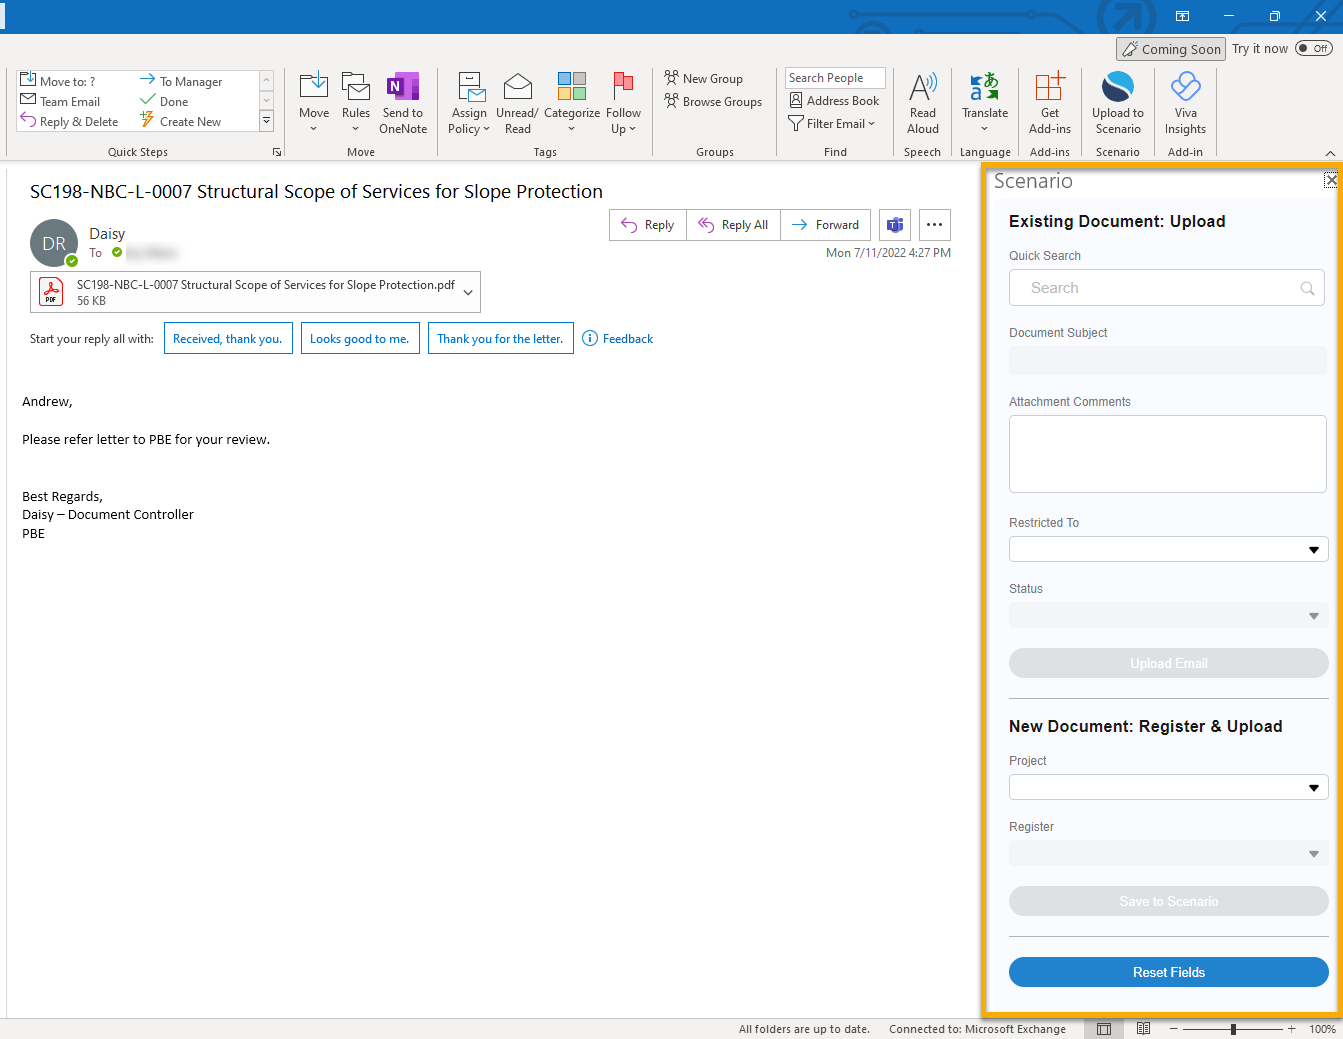
7. Scenario panel will appear with the options - either you want to upload an email to an existing Document or create a new Document then upload an email.
How do I Upload an email to an Existing Document
Email Document: Upload
1. Open an email and click ‘Upload to Scenario’ in the Ribbon
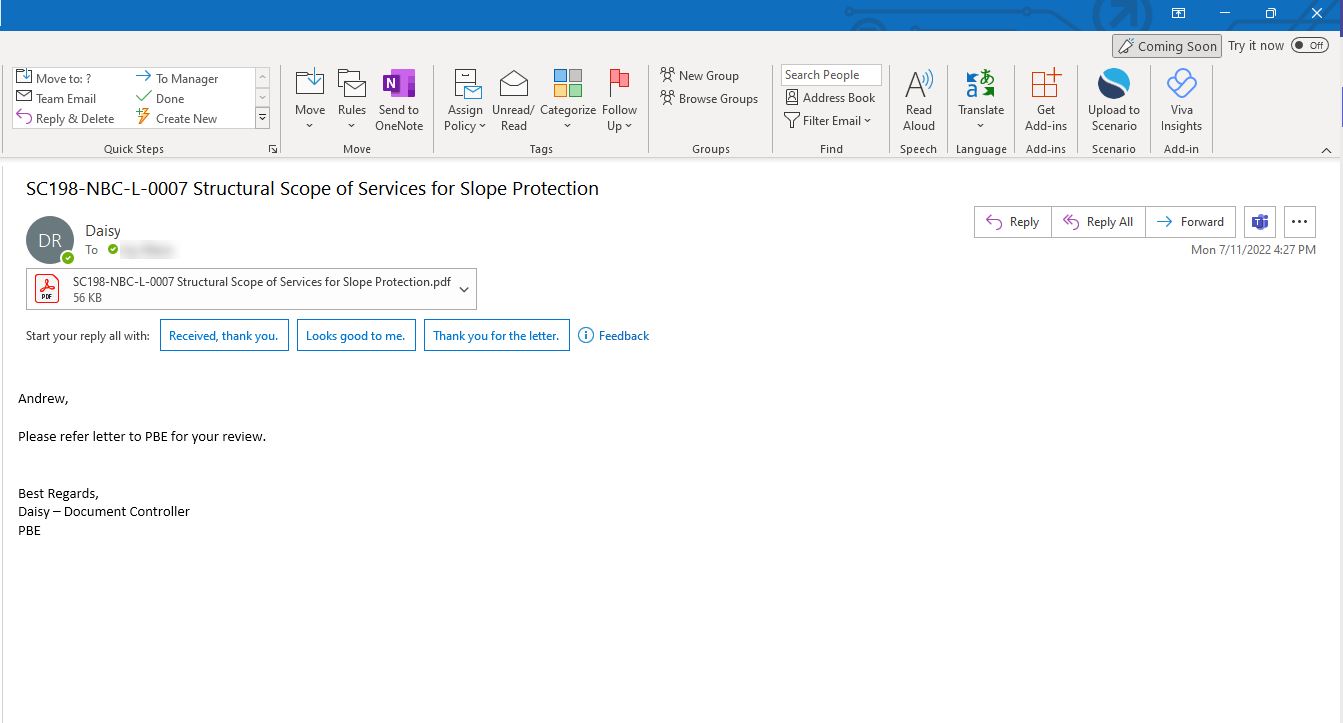
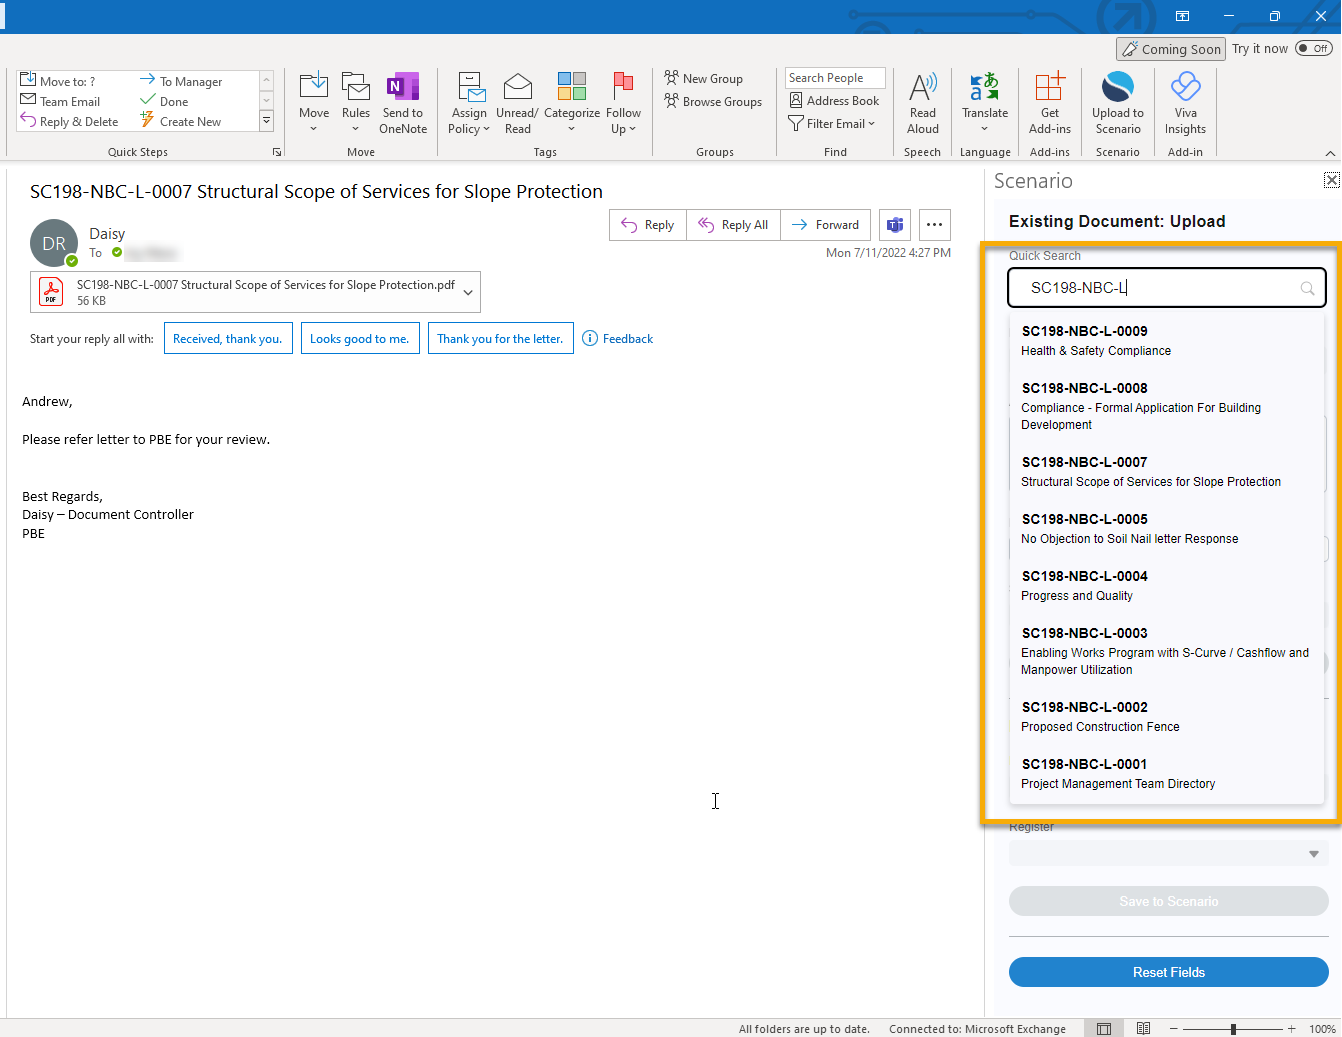
2. Use Quick Search to search by Document Number or Subject across all Projects you have access. This will list the 10 latest Documents.
Sample - Search for partial Document No.
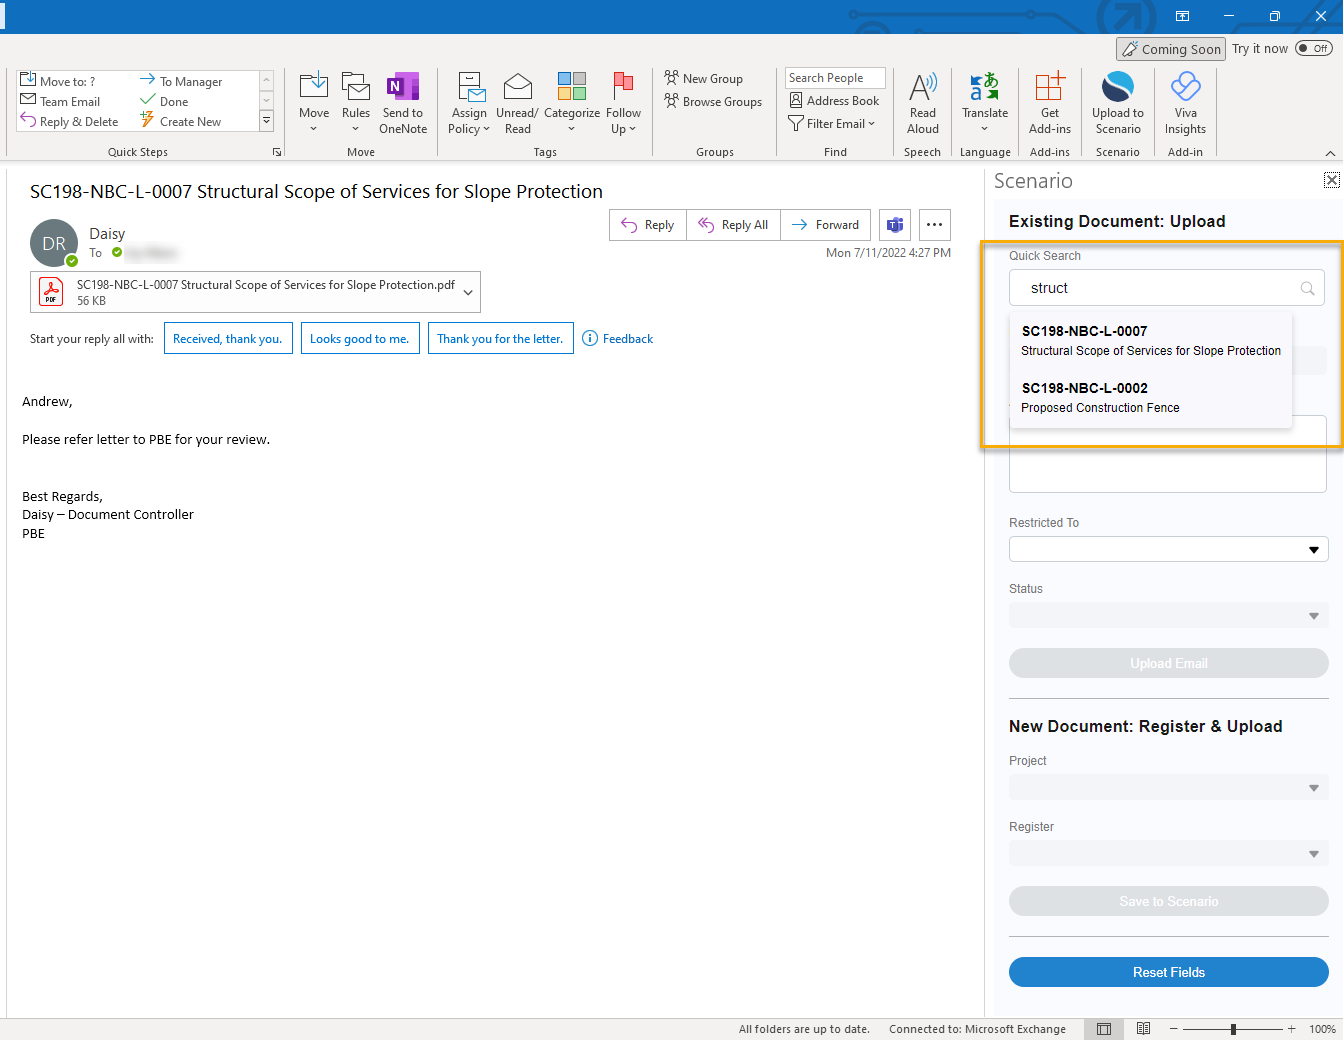
Sample - Search for partial Subject.
Showing the10 latest existing Documents across all Projects you have access.
3. Select a Document from the list.
Document Subject is a disabled field and shows your selected Document subject.
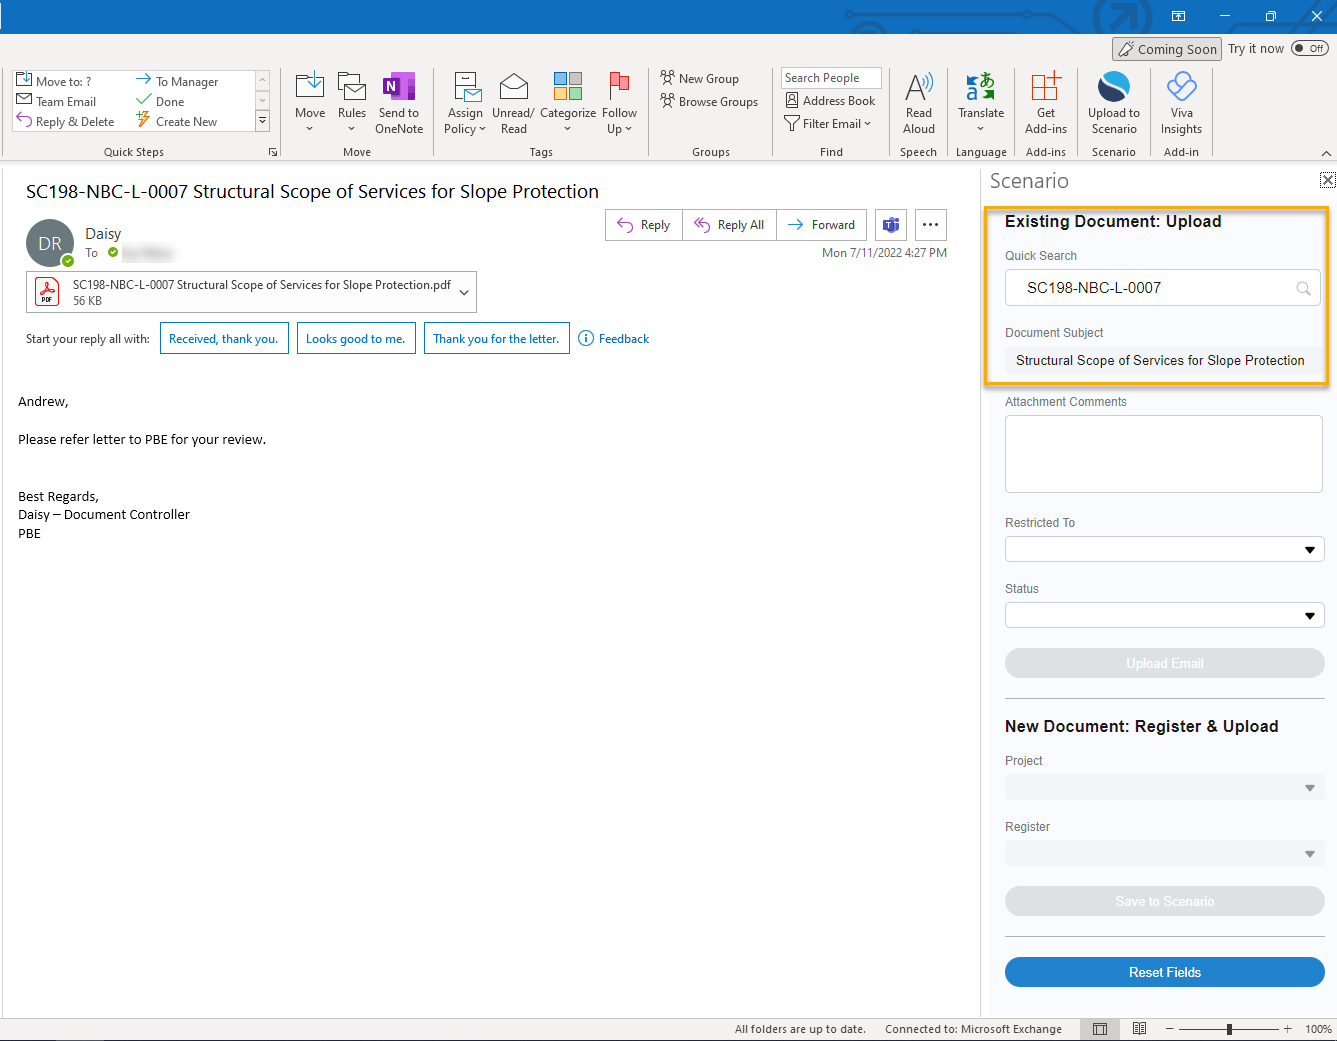
4. Enter Attachment Comments
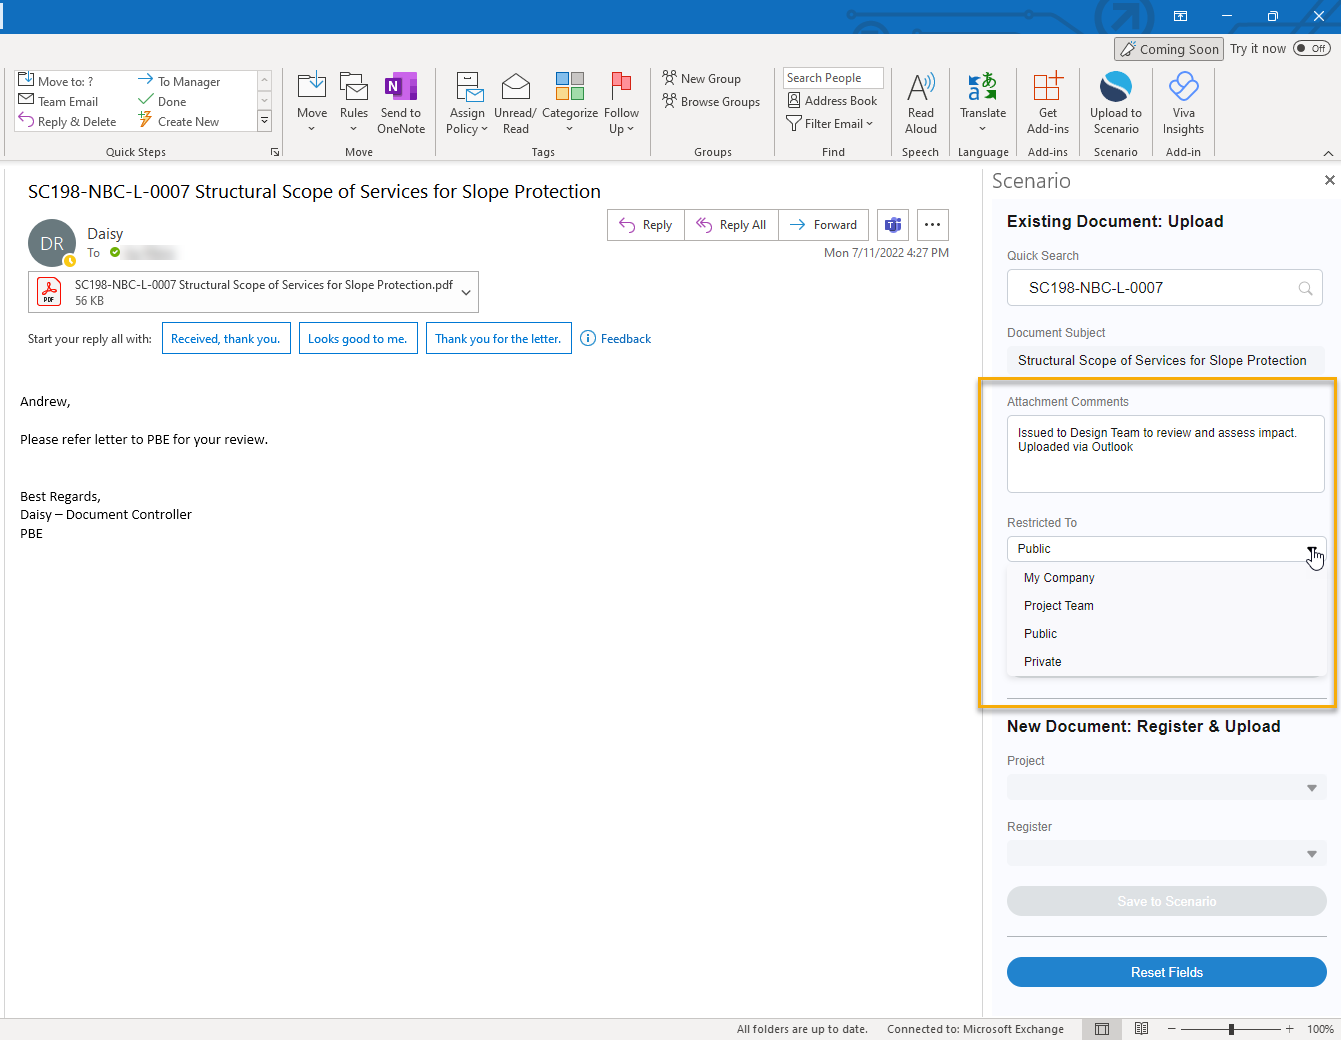
5. Select Restricted To from the drop-down list. Normal Attachment Security options in Scenario.
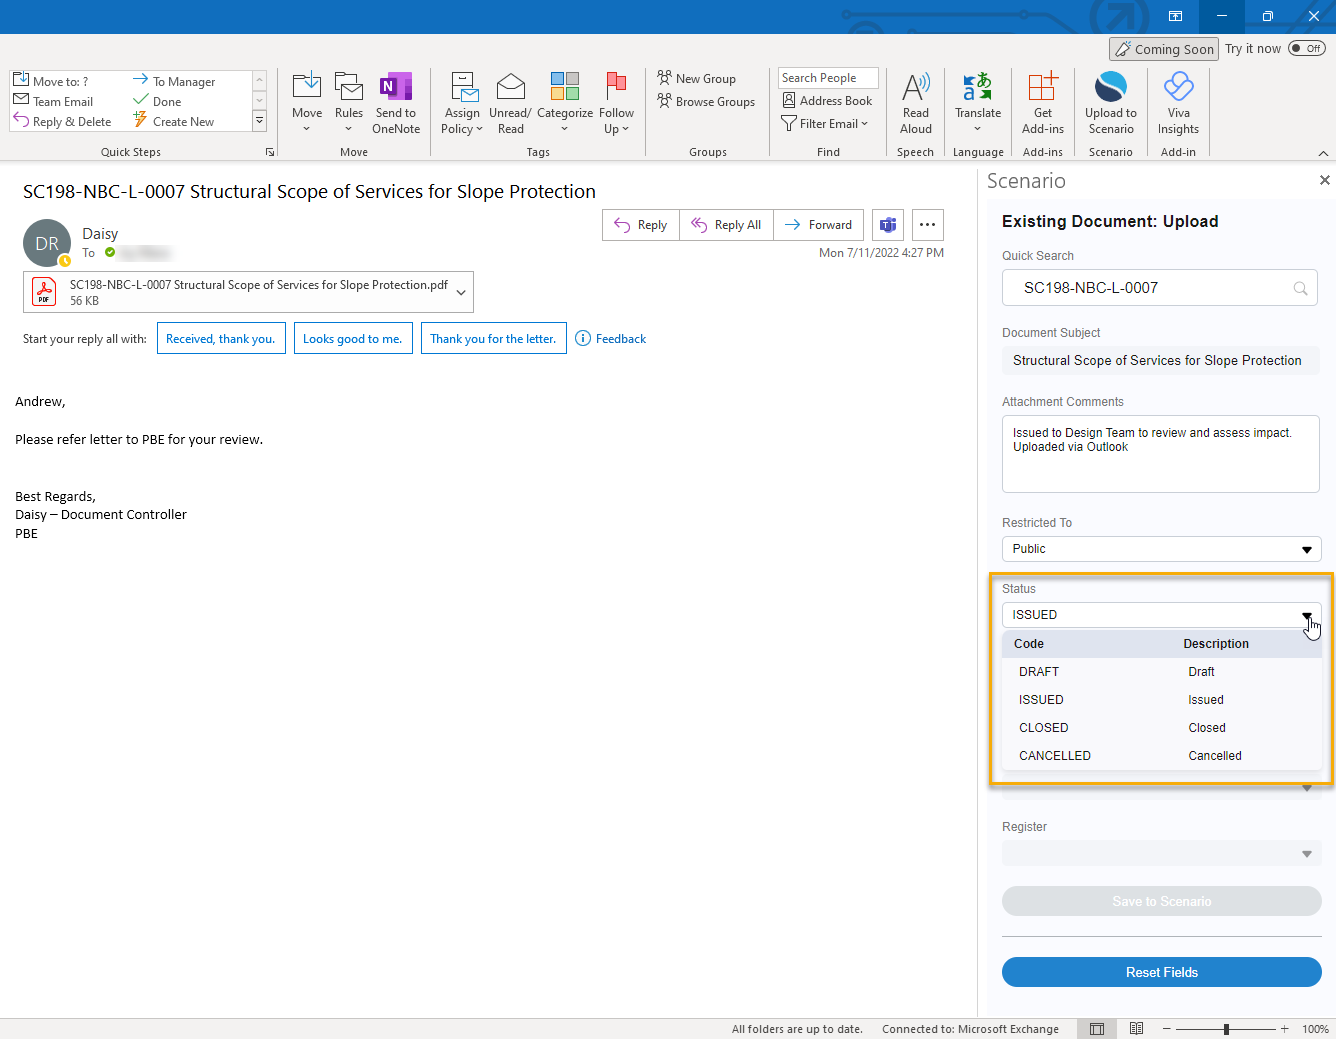
6. Select Attachment Status.
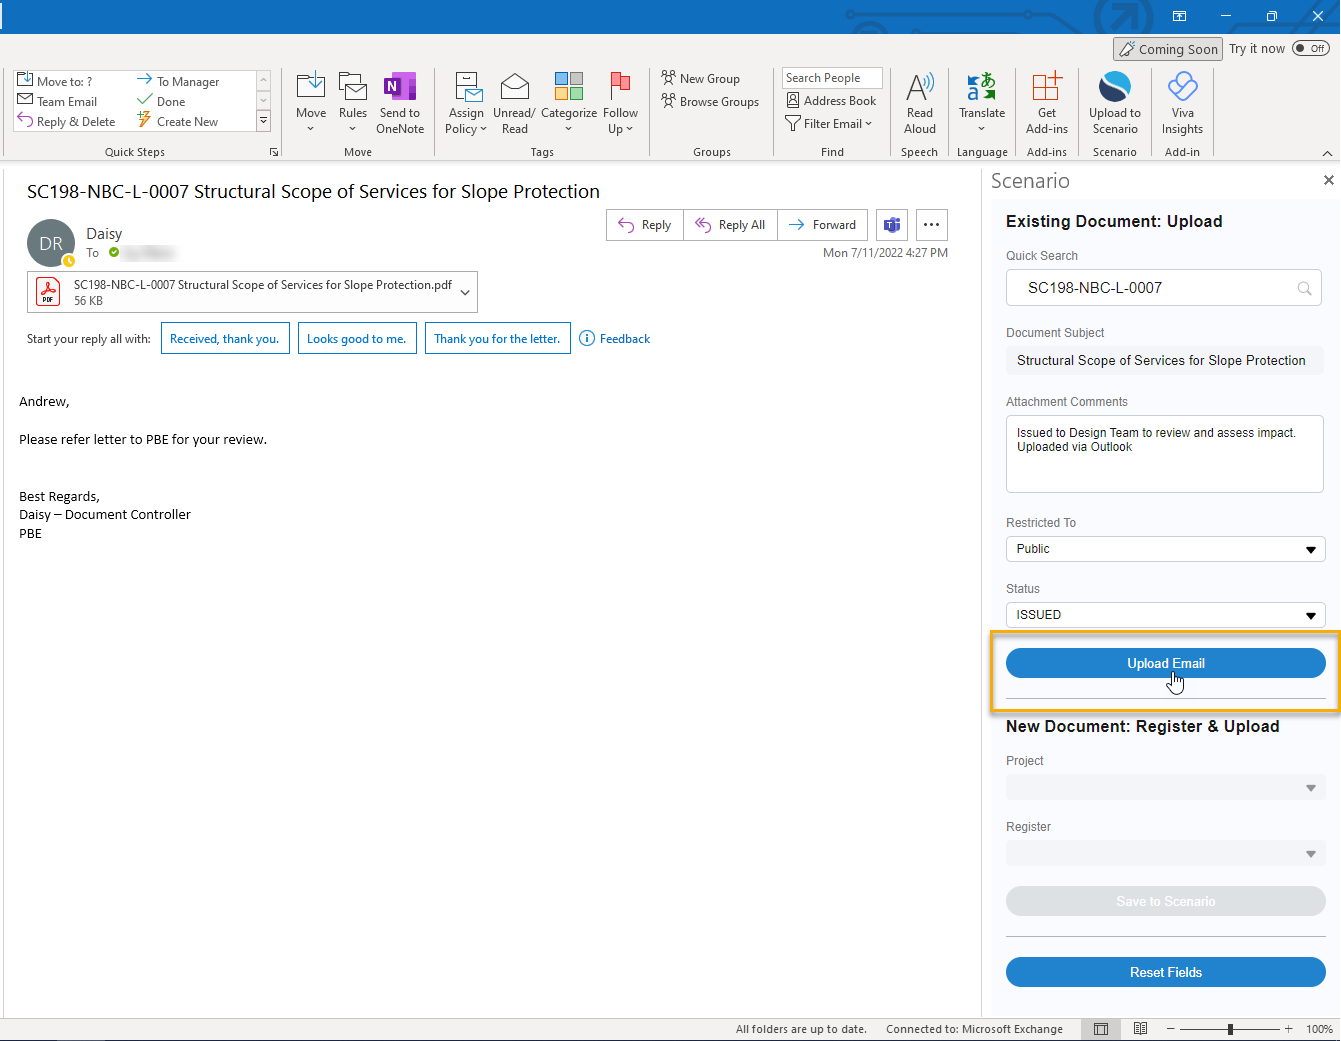
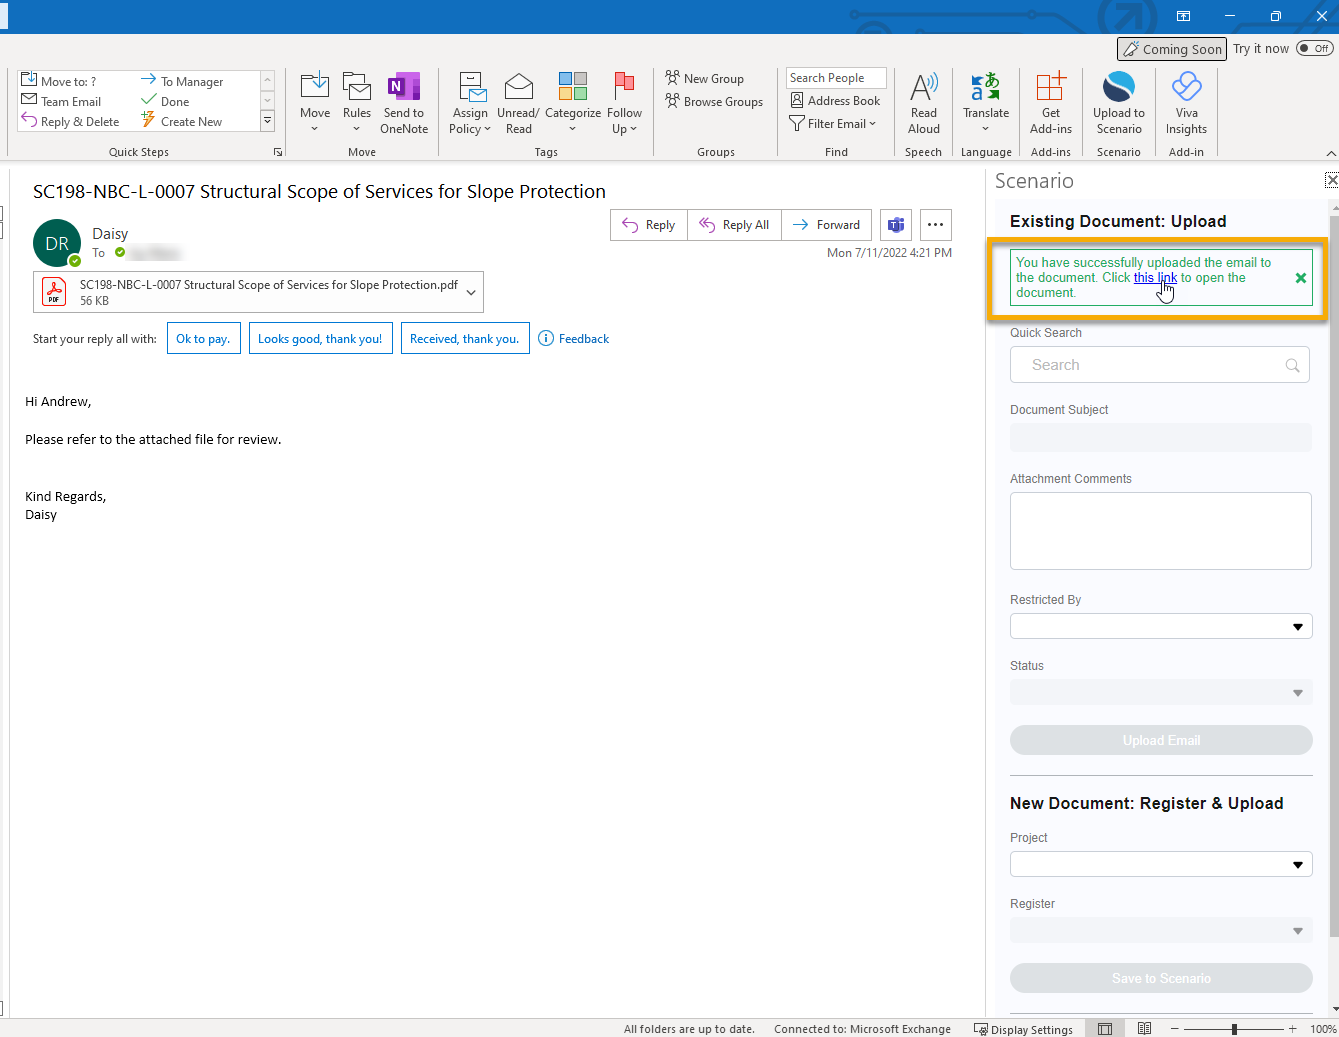
7. Click Upload Email button
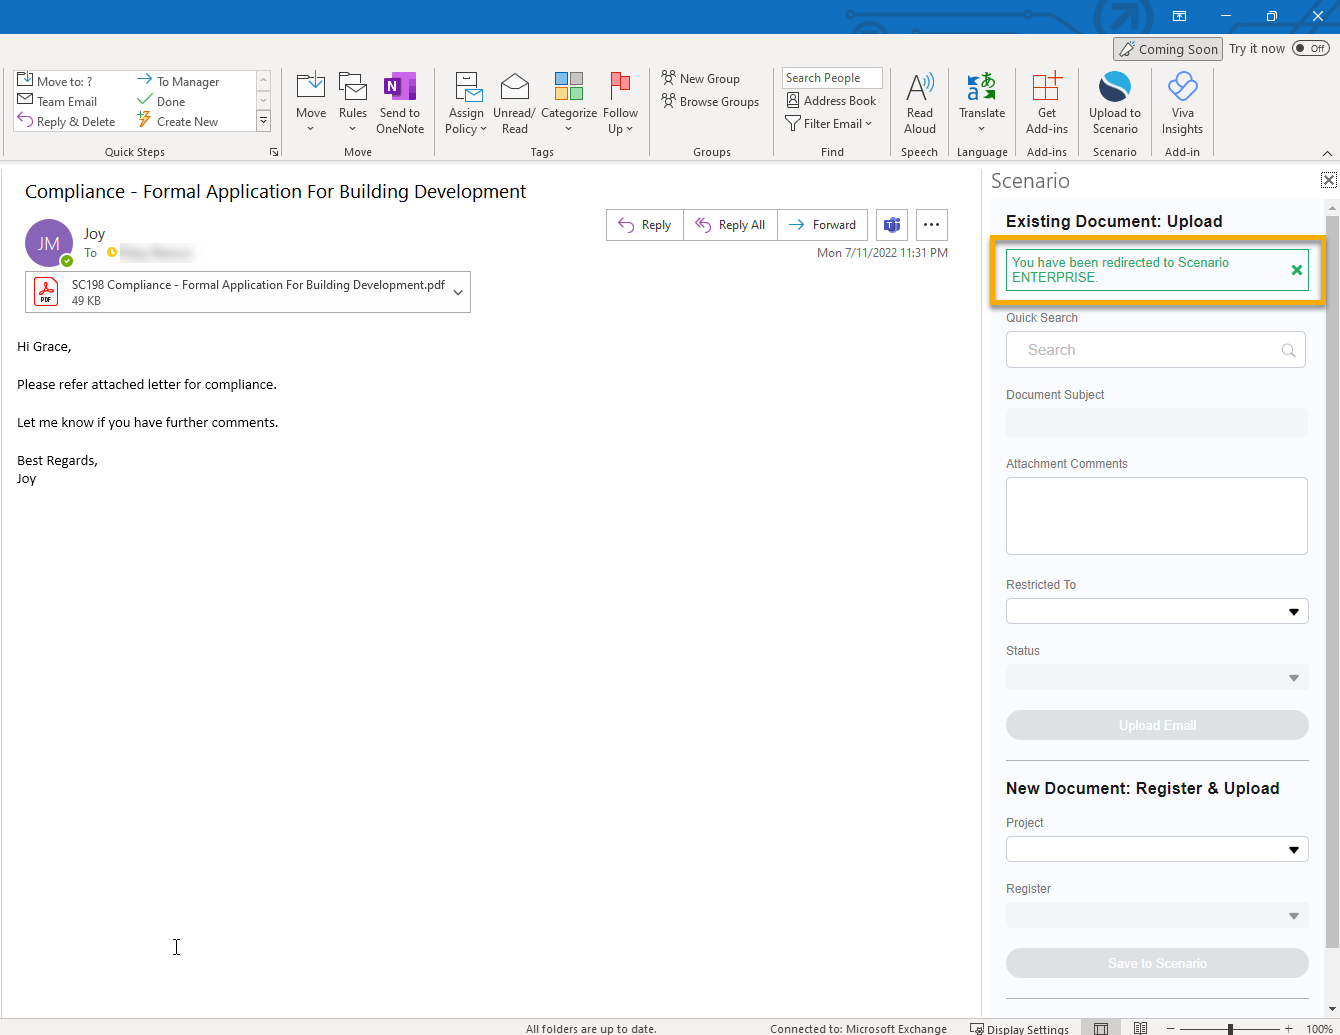
8. Message in the green text will appear with a hyperlink.

Click this link to redirect you to Scenario ENTERPRISE login page and directly open the Document where you have uploaded the email.
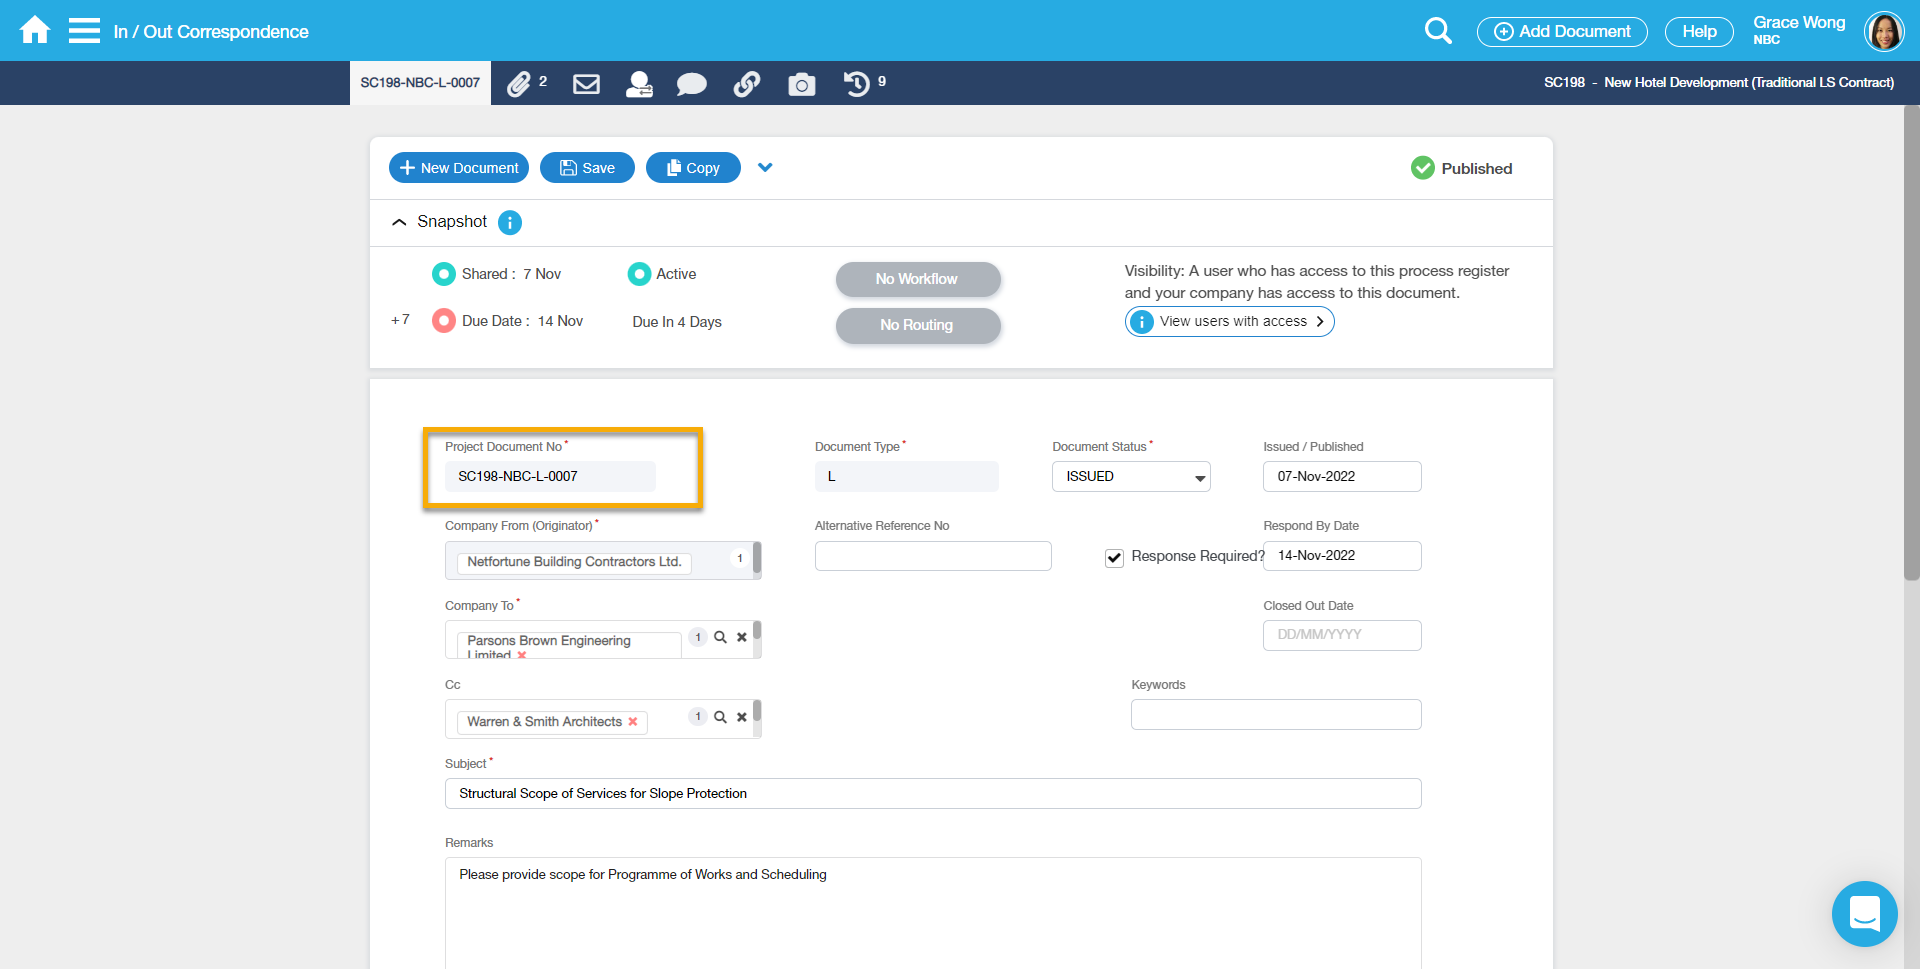
9. IF you already logged in to Scenario ENTERPRISE, this opens a new tab on the browser and directly opens the Document.
IF you have not logged yet in to Scenario, this will redirect you to Scenario ENTERPRISE login page.
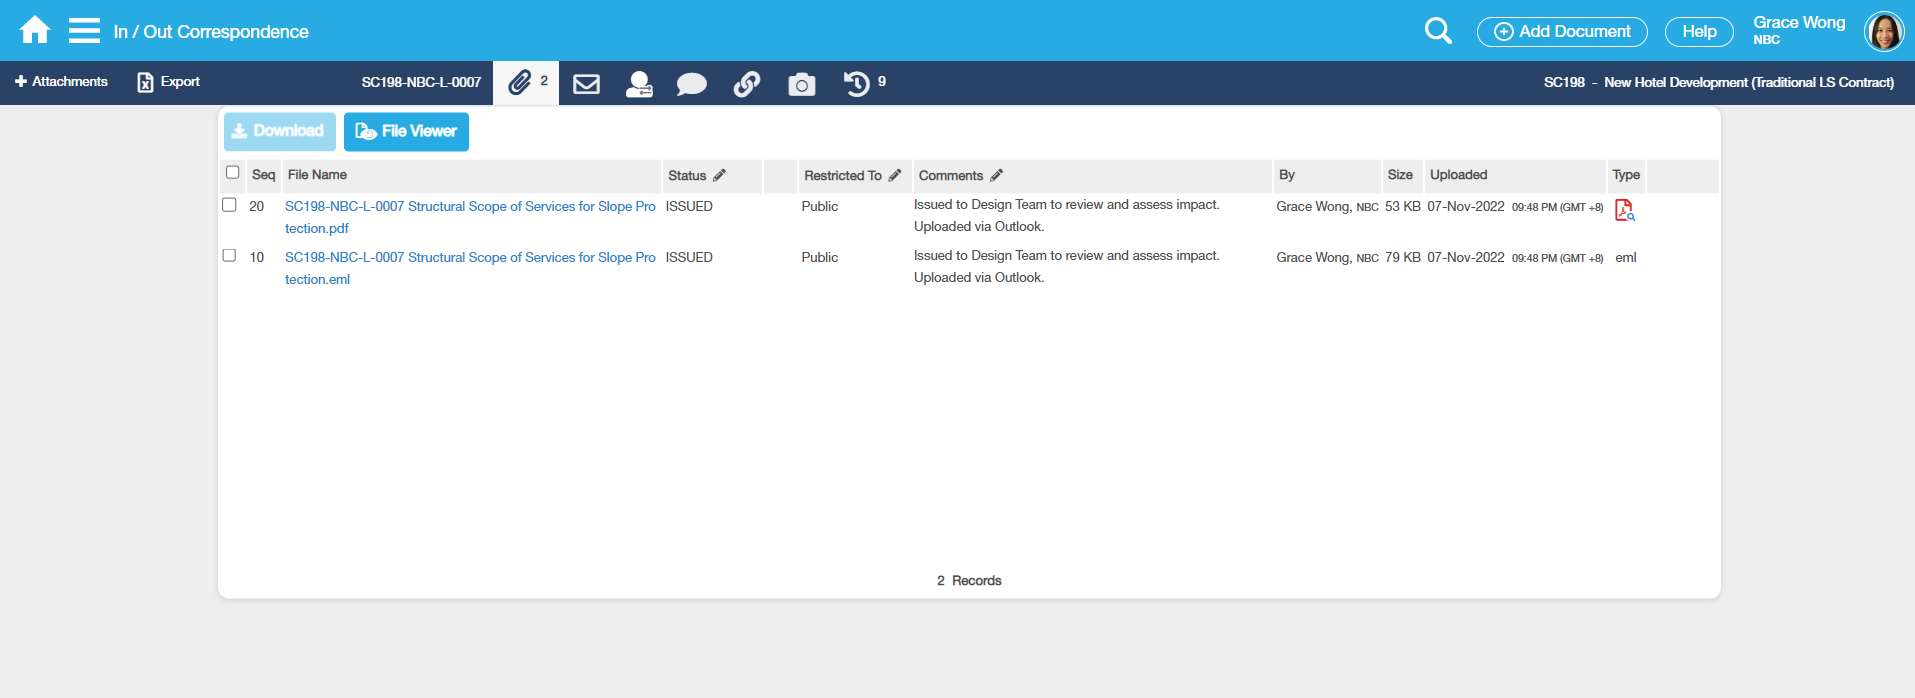
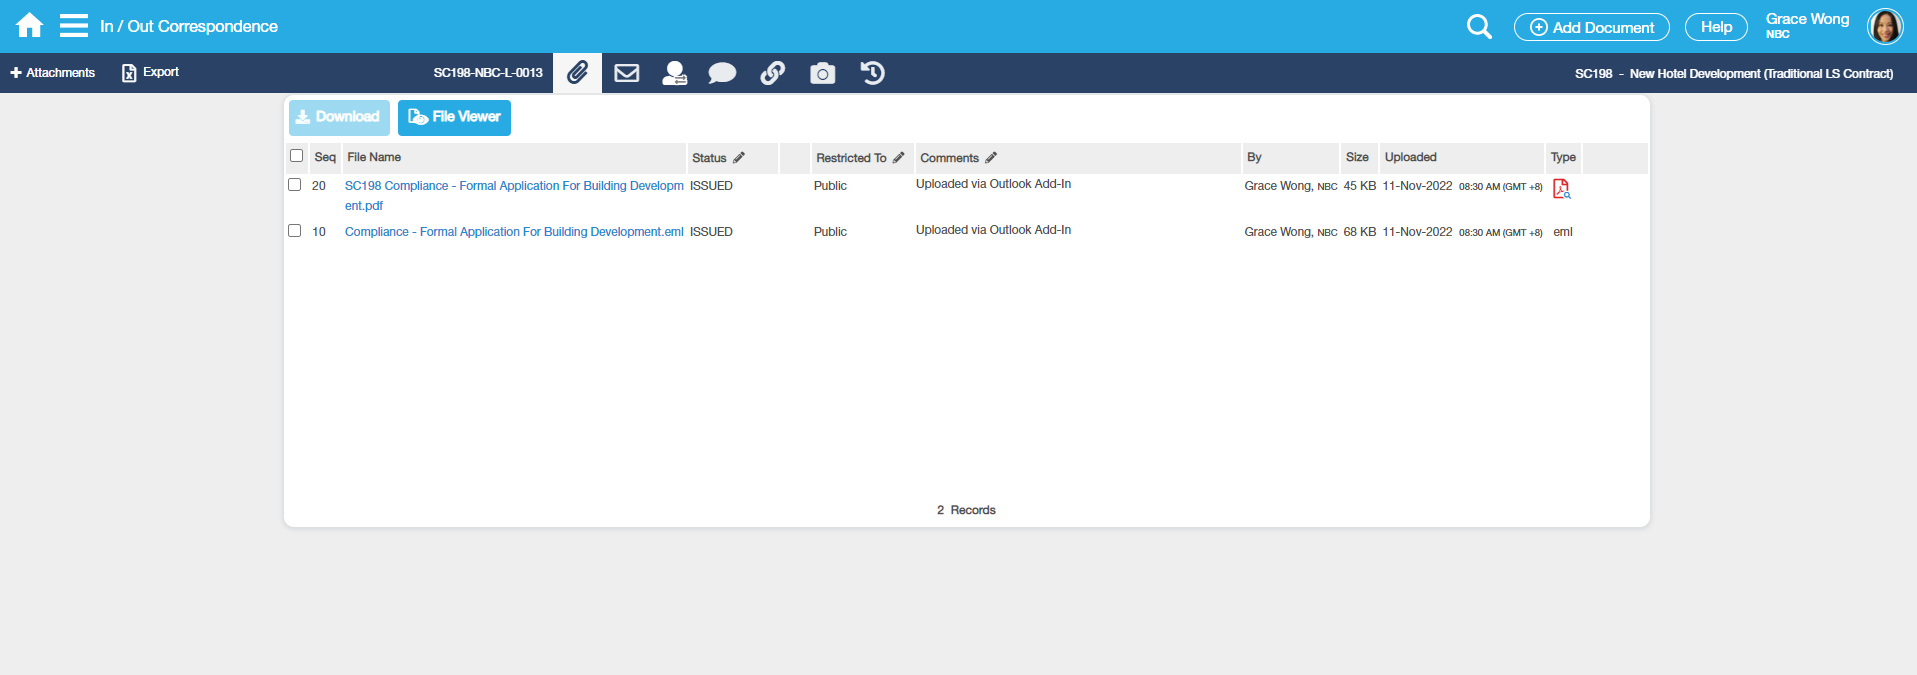
10. Go to the Document > Attachments tab. You can now view the email and its attachment files as separate Attachments.
Attachment Status, Restricted To and Attachment Comments as entered on Outlook Add-in are also captured.
11. History tab will also log upload history

How do I Create New Document and Upload an email
New Document: Register & Upload
1. Open an email
2. Select a Project to create a Document for in the Project drop-down list
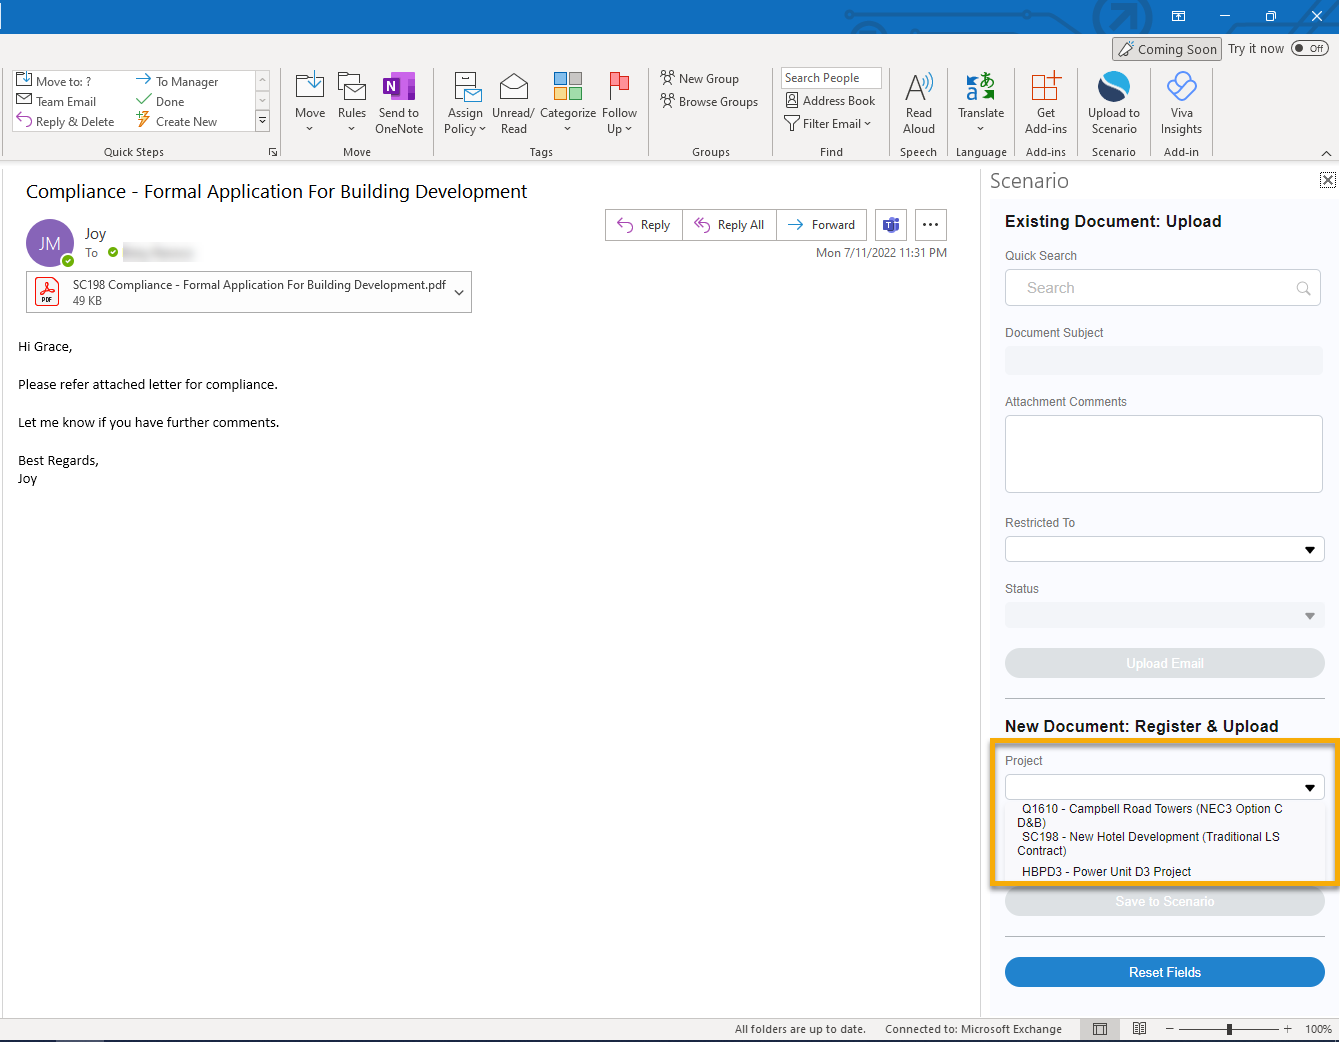
3. Select a Process Register in the Register drop-down list
Note: This drop-down list shows only selected Process Registers being configured to use Outlook Add-in. The Process Register Security still applies.
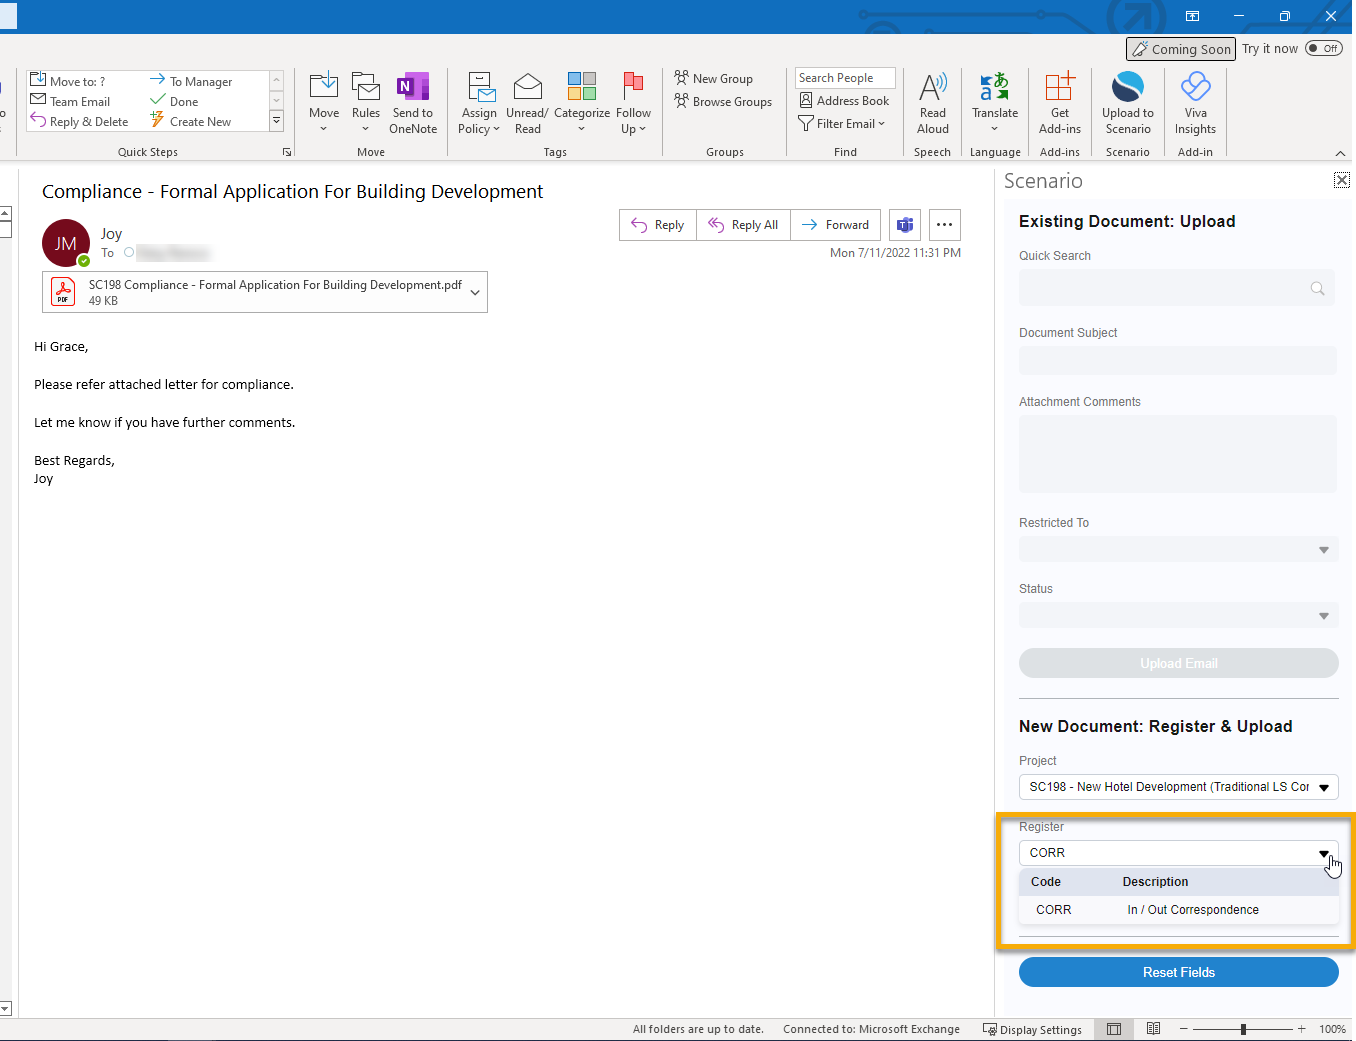
4. Click Save to Scenario to create a new Document.
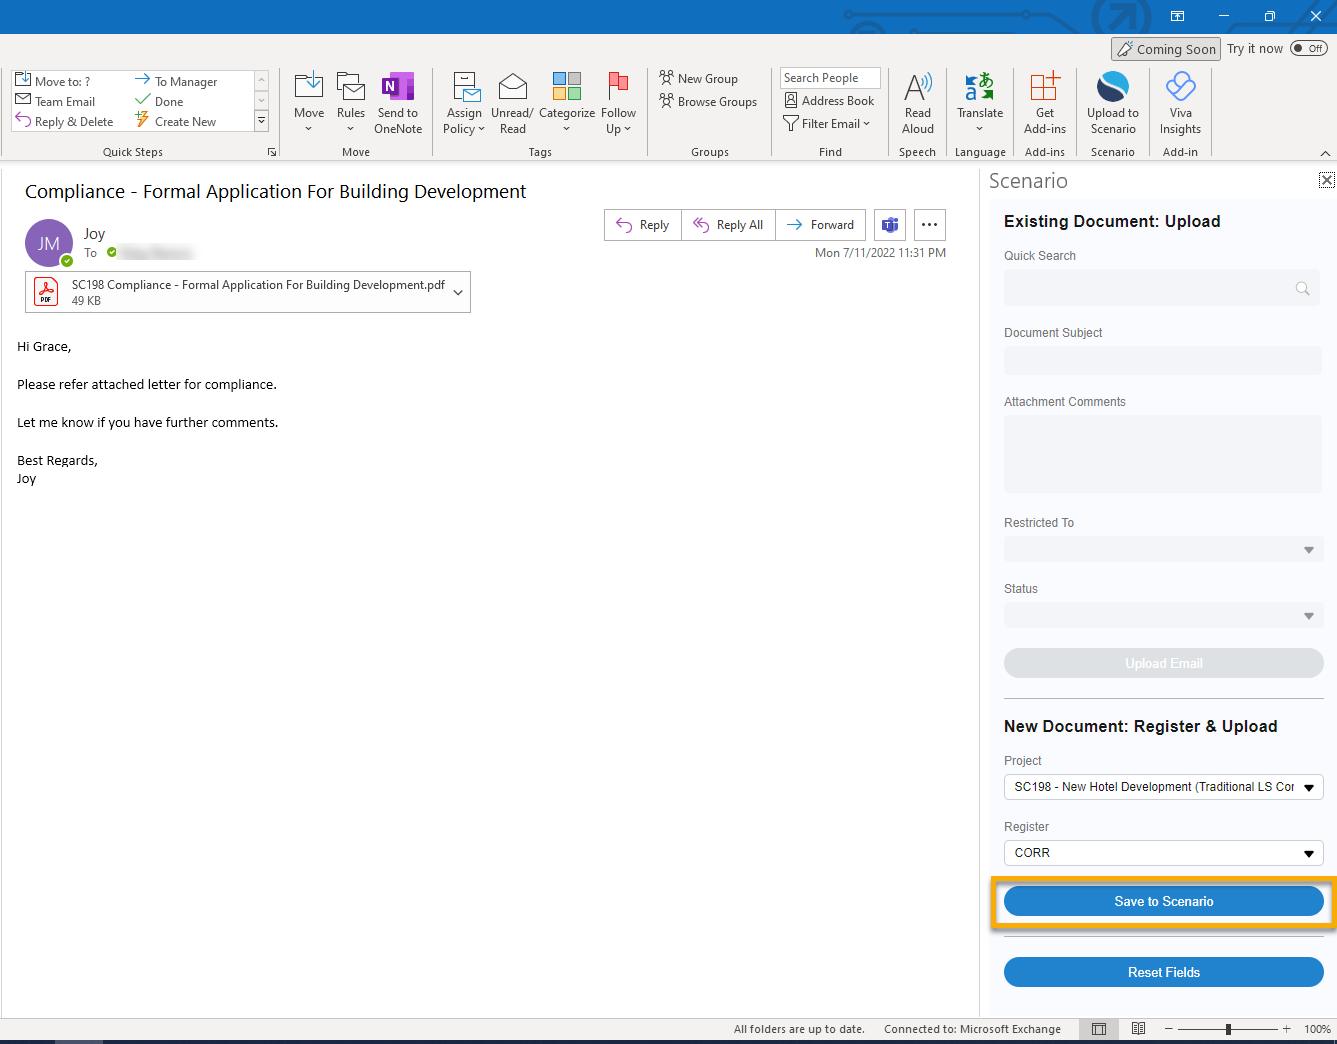
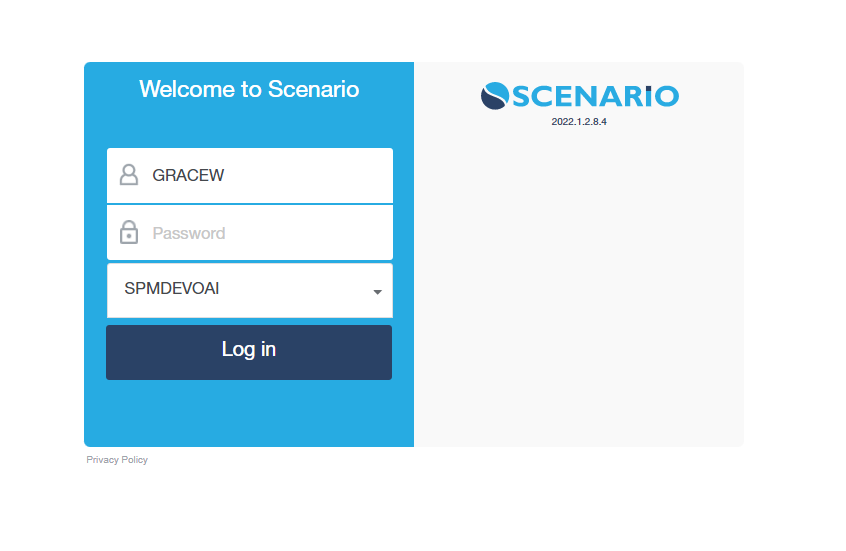
5. IF you are already logged in to Scenario ENTERPRISE, this opens a new browser tab and automatically opens a blank Document Form ready for your input.
IF you are not logged in to Scenario ENTERPRISE, this will redirect you to Scenario ENTERPRISE Login page.
Document Form > Subject field will automatically capture the email subject.
Note: Attachment(s) will be uploaded after the document is saved.
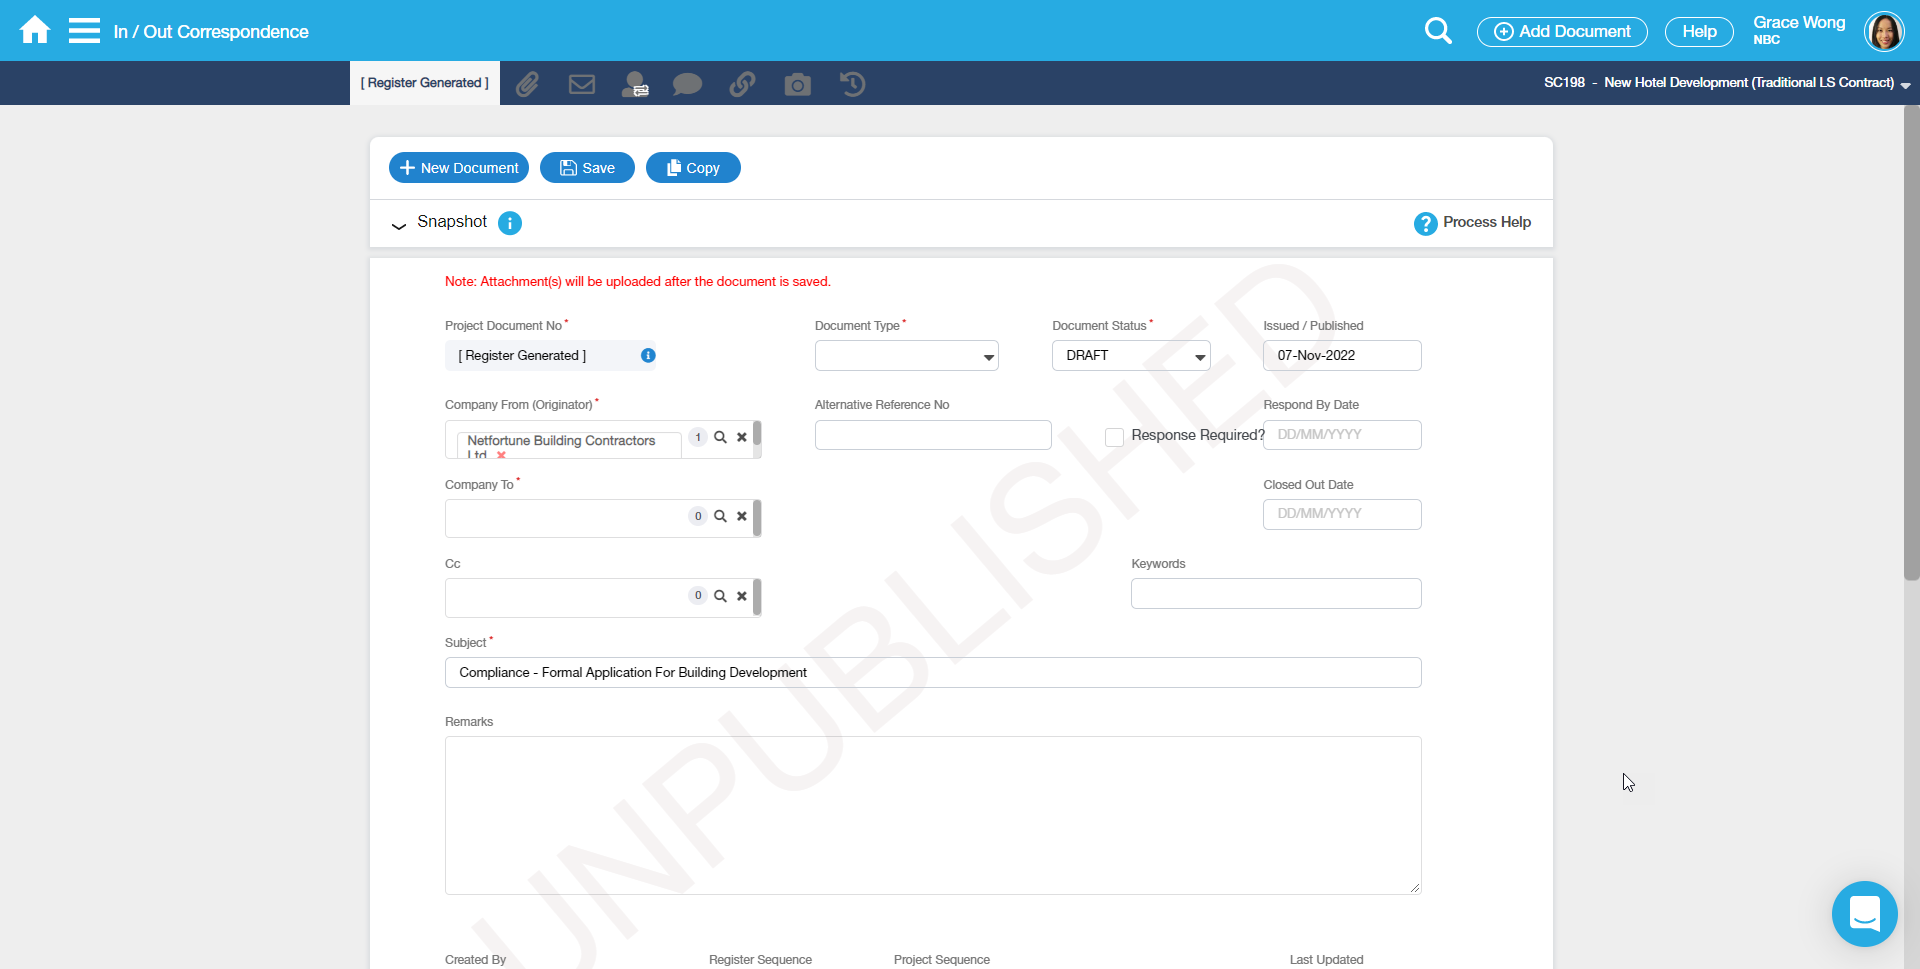
6. Fill out meta data fields of the document and click Save.
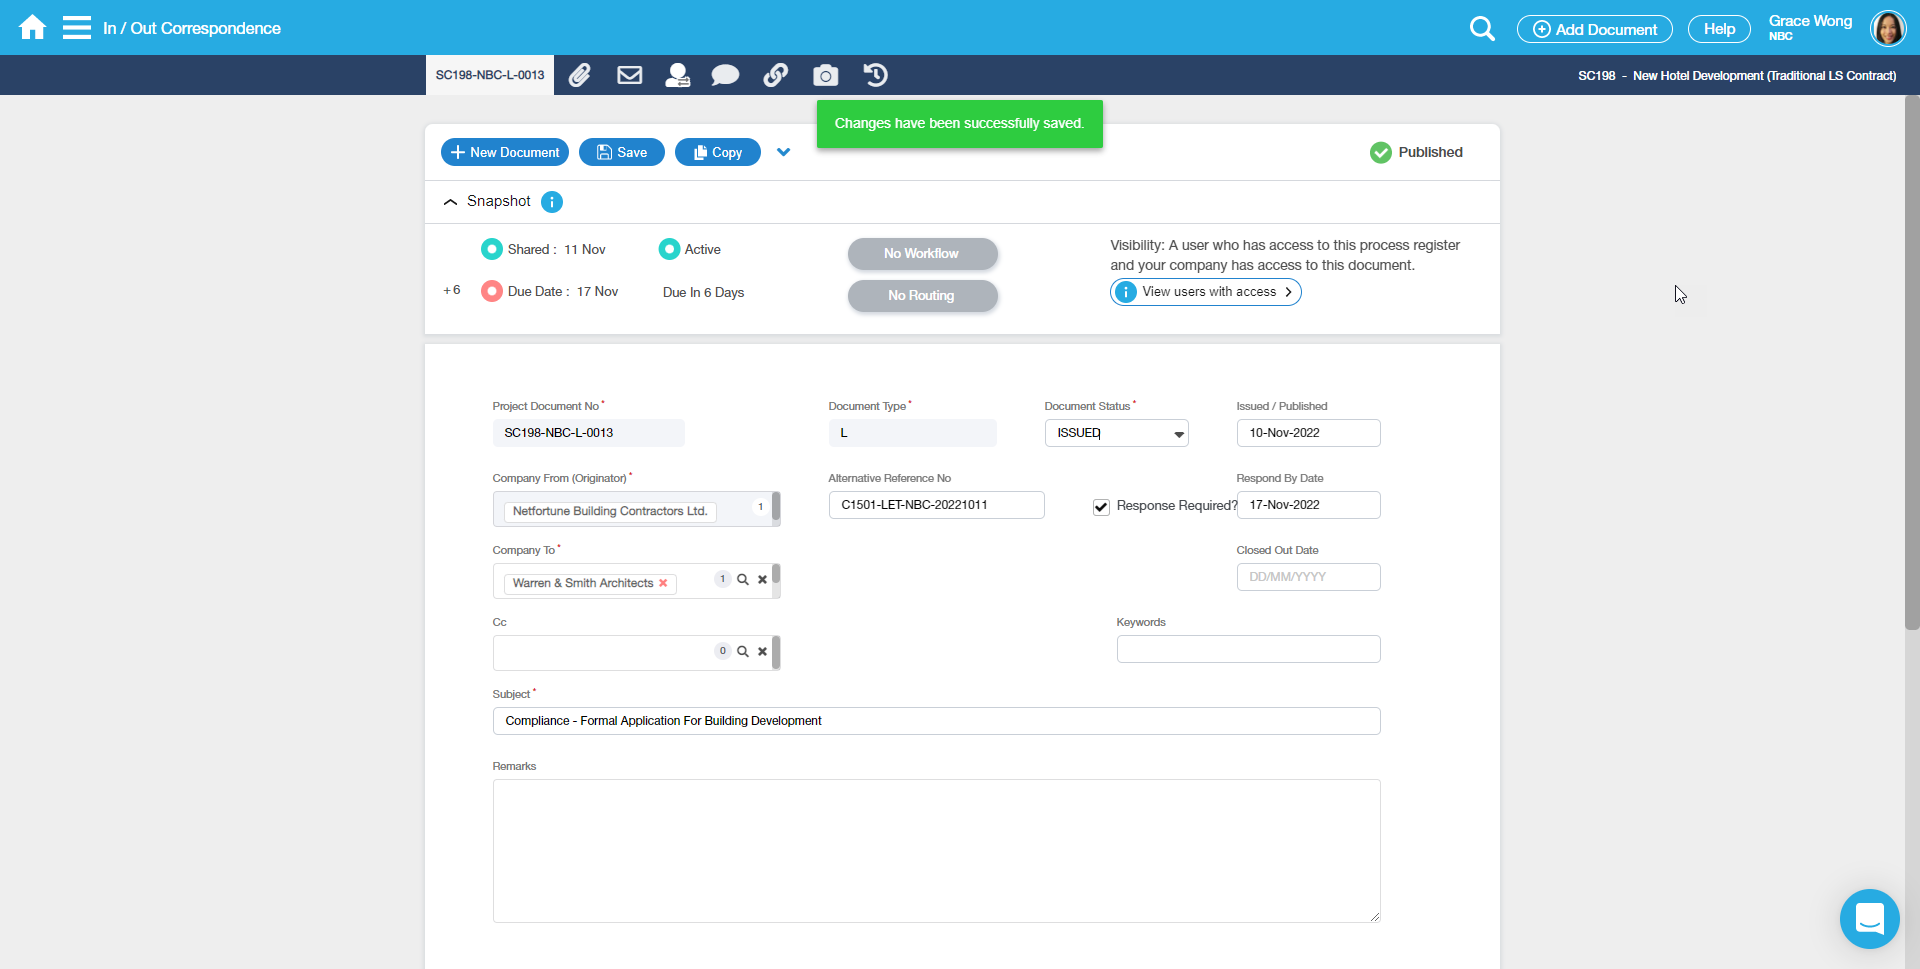
7. Go to Attachment tab and you can view the email and its attachment file as separate Attachments.
8. Also if you check back on Scenario Outlook Add-in, you will see a message that it was redirected to Scenario ENTERPRISE.
