Attachments Tab
Contents
Overview
The Attachments Tab is the tab with the PAPERCLIP icon. If User has Task Permission – Allow Upload Attachment set to Full Access, you can process upload attachments, else User will be informed for the missing task permission.
Files (of any file type) can be attached to a Document from the Attachments tab. Once uploaded, attachments can then be downloaded, cross-referenced or emailed to recipients.
Screen Explanation
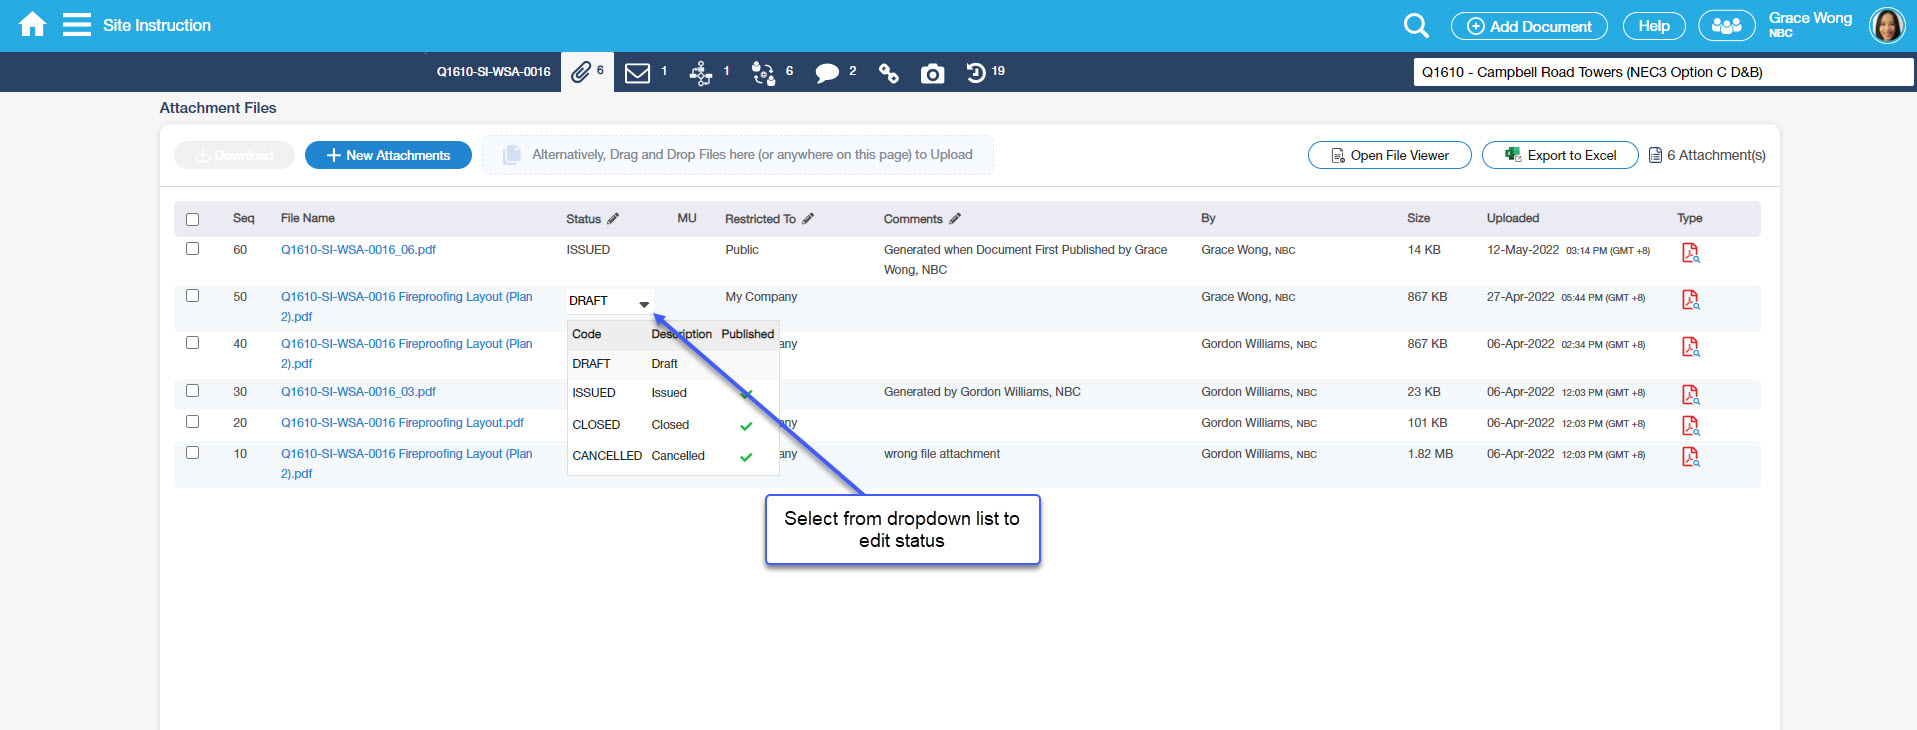
Non-Revisable Document Attachments Tab

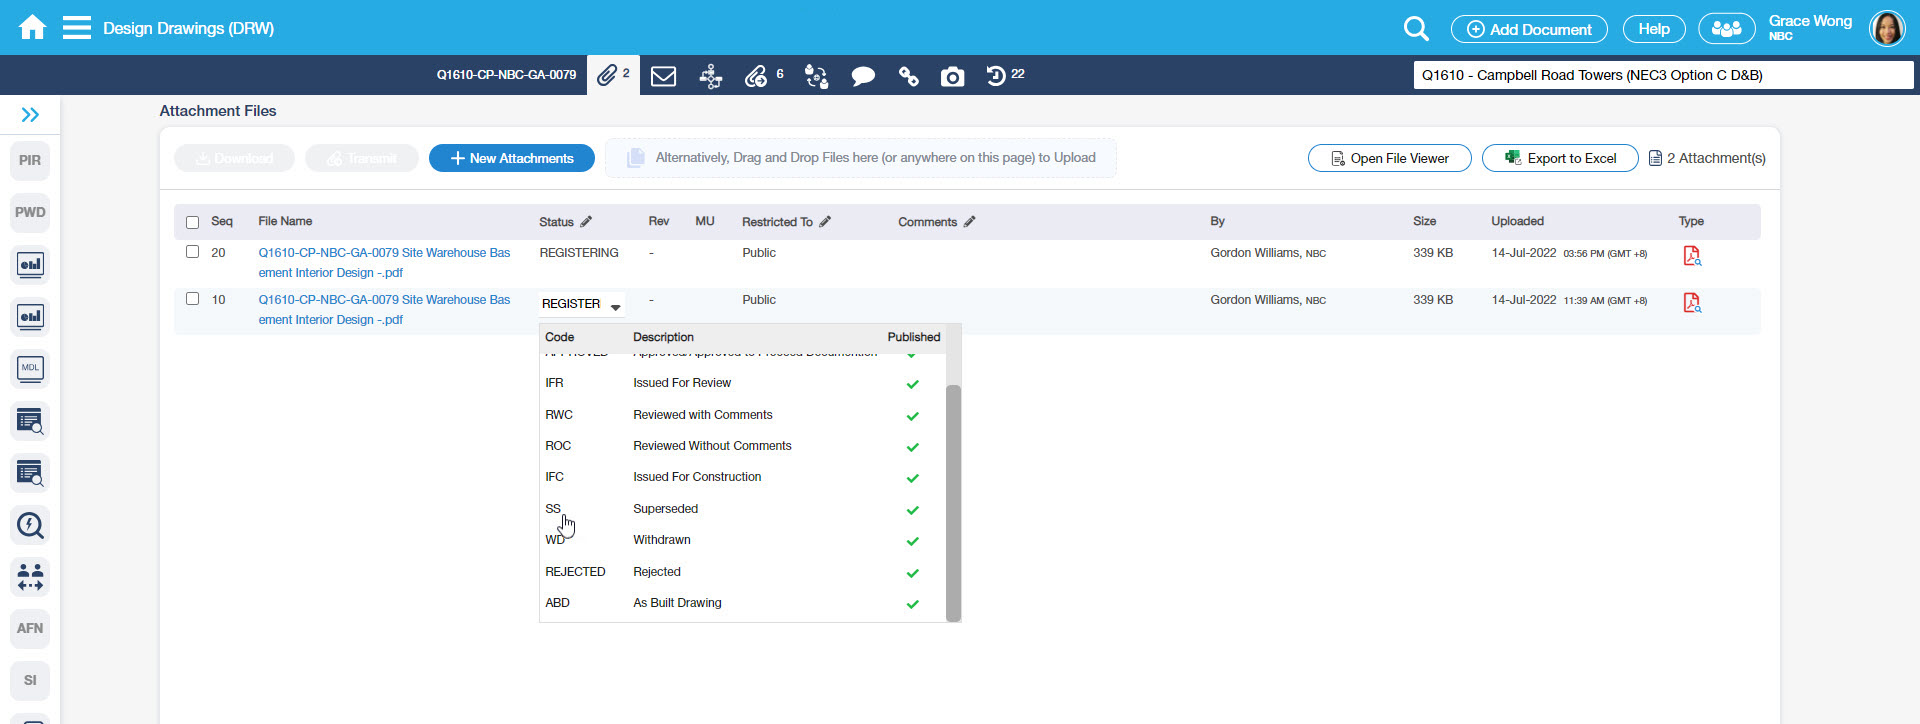
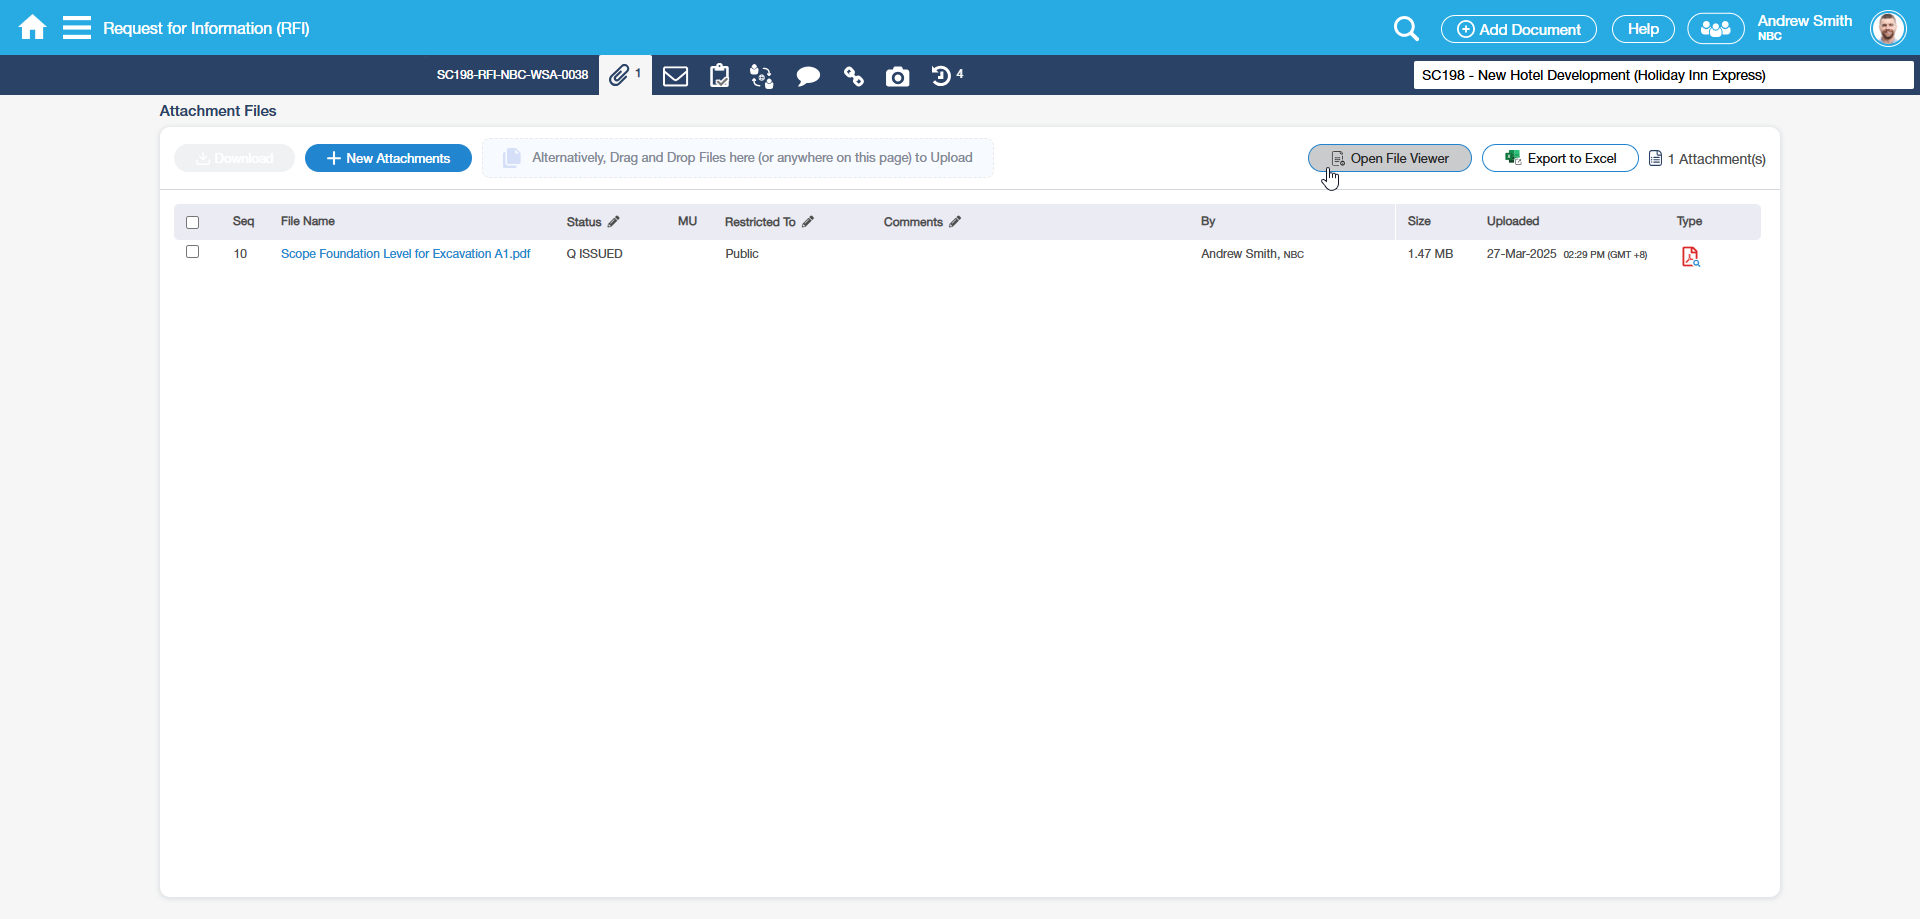
Revisable Document Attachments Tab

Icons/Buttons | Description |
|---|---|
+ Attachments Button | When clicked, you will be prompted with the Upload Attachments window and can browse files to be uploaded. |
Download | This button is used to download single or multiple attachments. |
| File Viewer | When clicked, it will open a new tab and can view the attachments in the document. |
| Export Button | When clicked, all attached files under Attachment Tab are export |
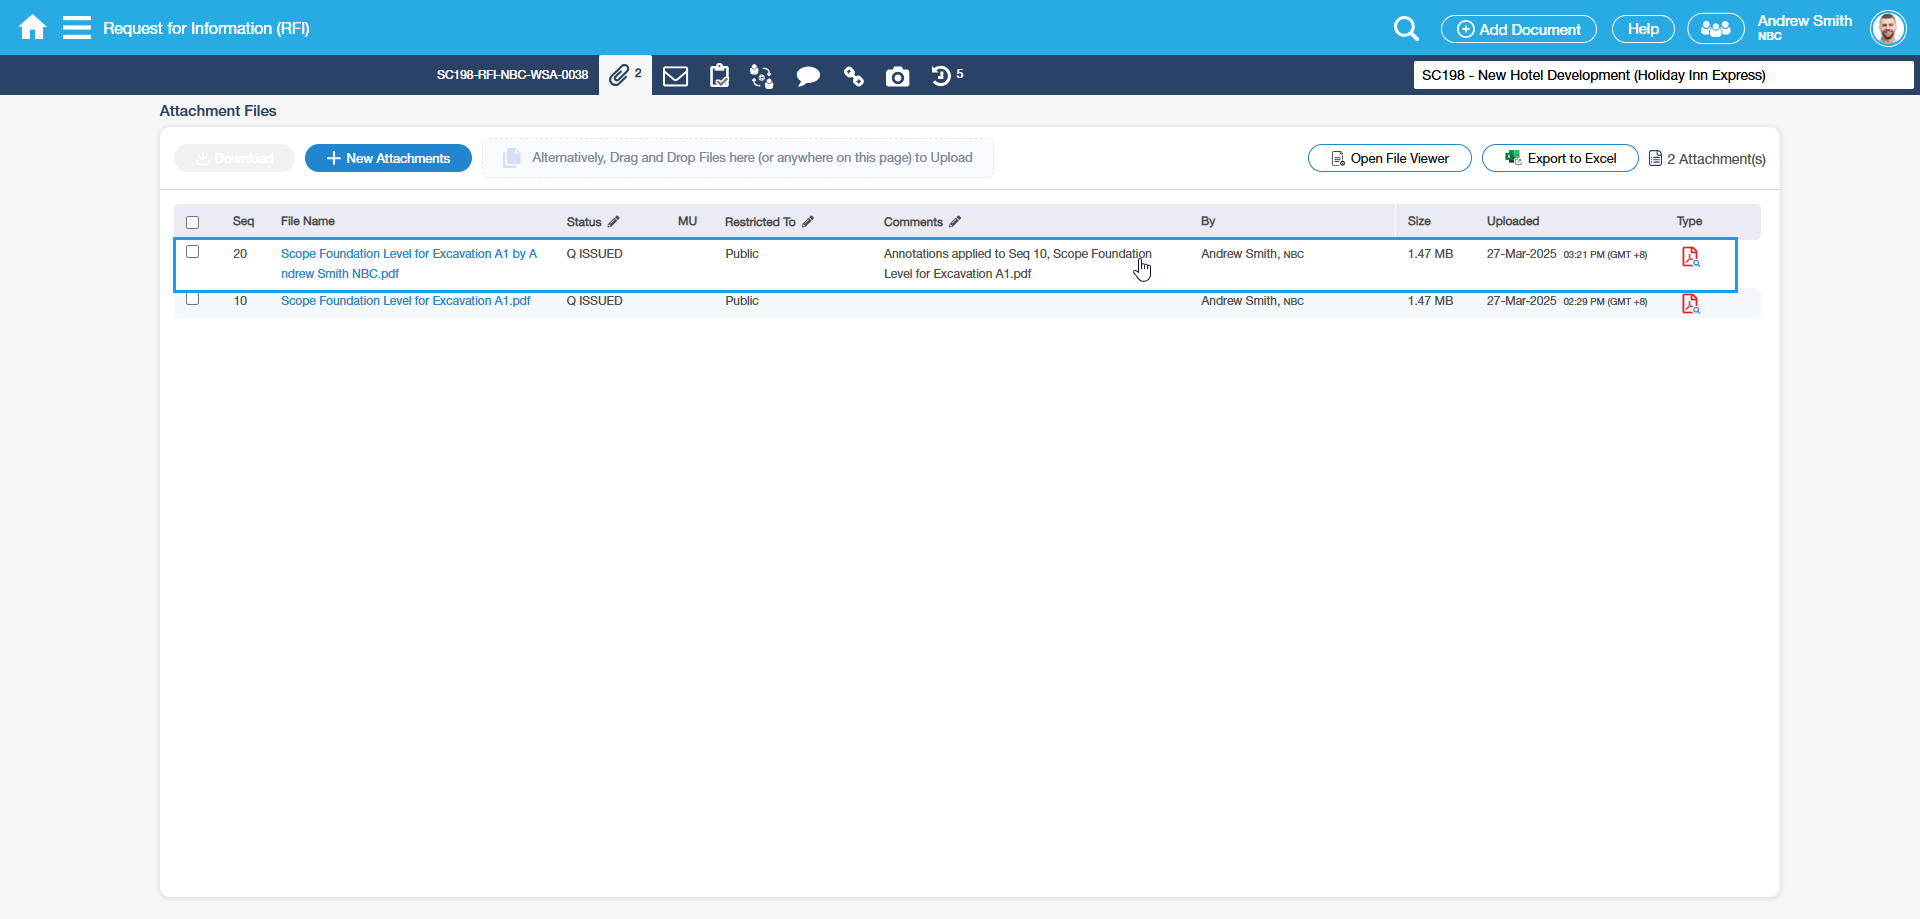
| Red Brush Icon | The red brush icon indicates that online mark-up or offline mark-up exists against the Attachment record. |
| PDF Preview Icon | Click on to see attachment PDF preview |
| Edit Icon | User can only edit the Status, Comments and the Restricted To values but cannot overwrite the attachment. |
| Delete/Trashcan Icon | This icon will only display to those Users that has assigned task permission to delete attachments and with ‘Draft’ attachment status. Also, only those users with assigned Full Access to delete attachments will able to delete attachment files. |
Upload Attachment Dialog
The '+ Attachments' option will be enabled and you can process upload attachment(s) only when the Form Entry Details tab has been completed and saved.
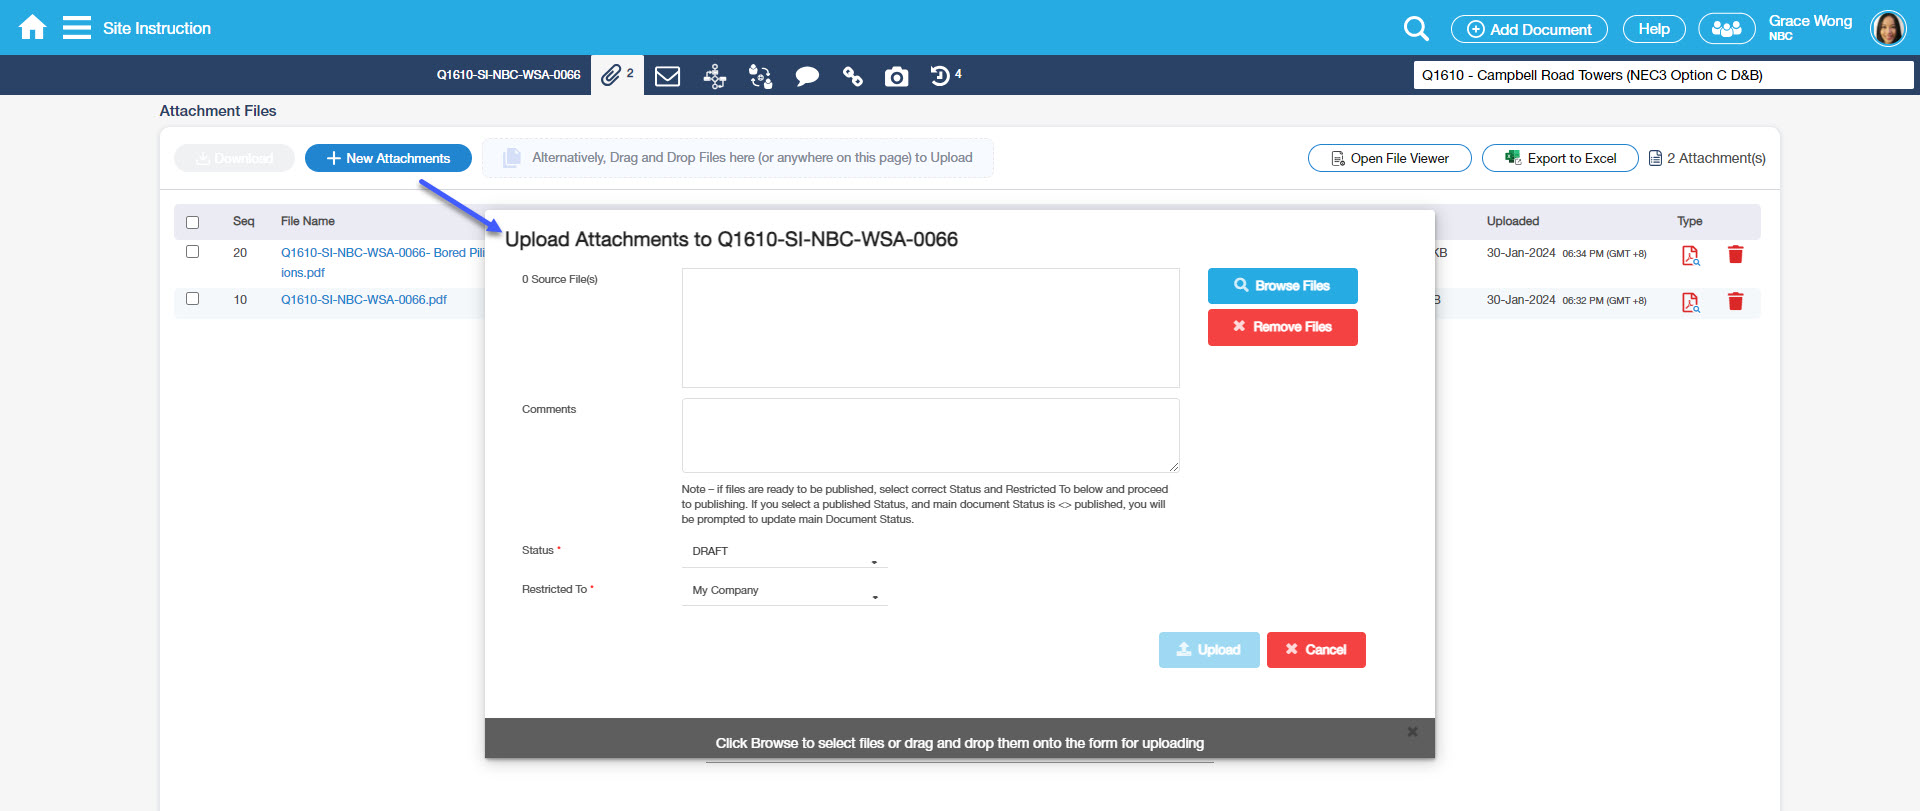
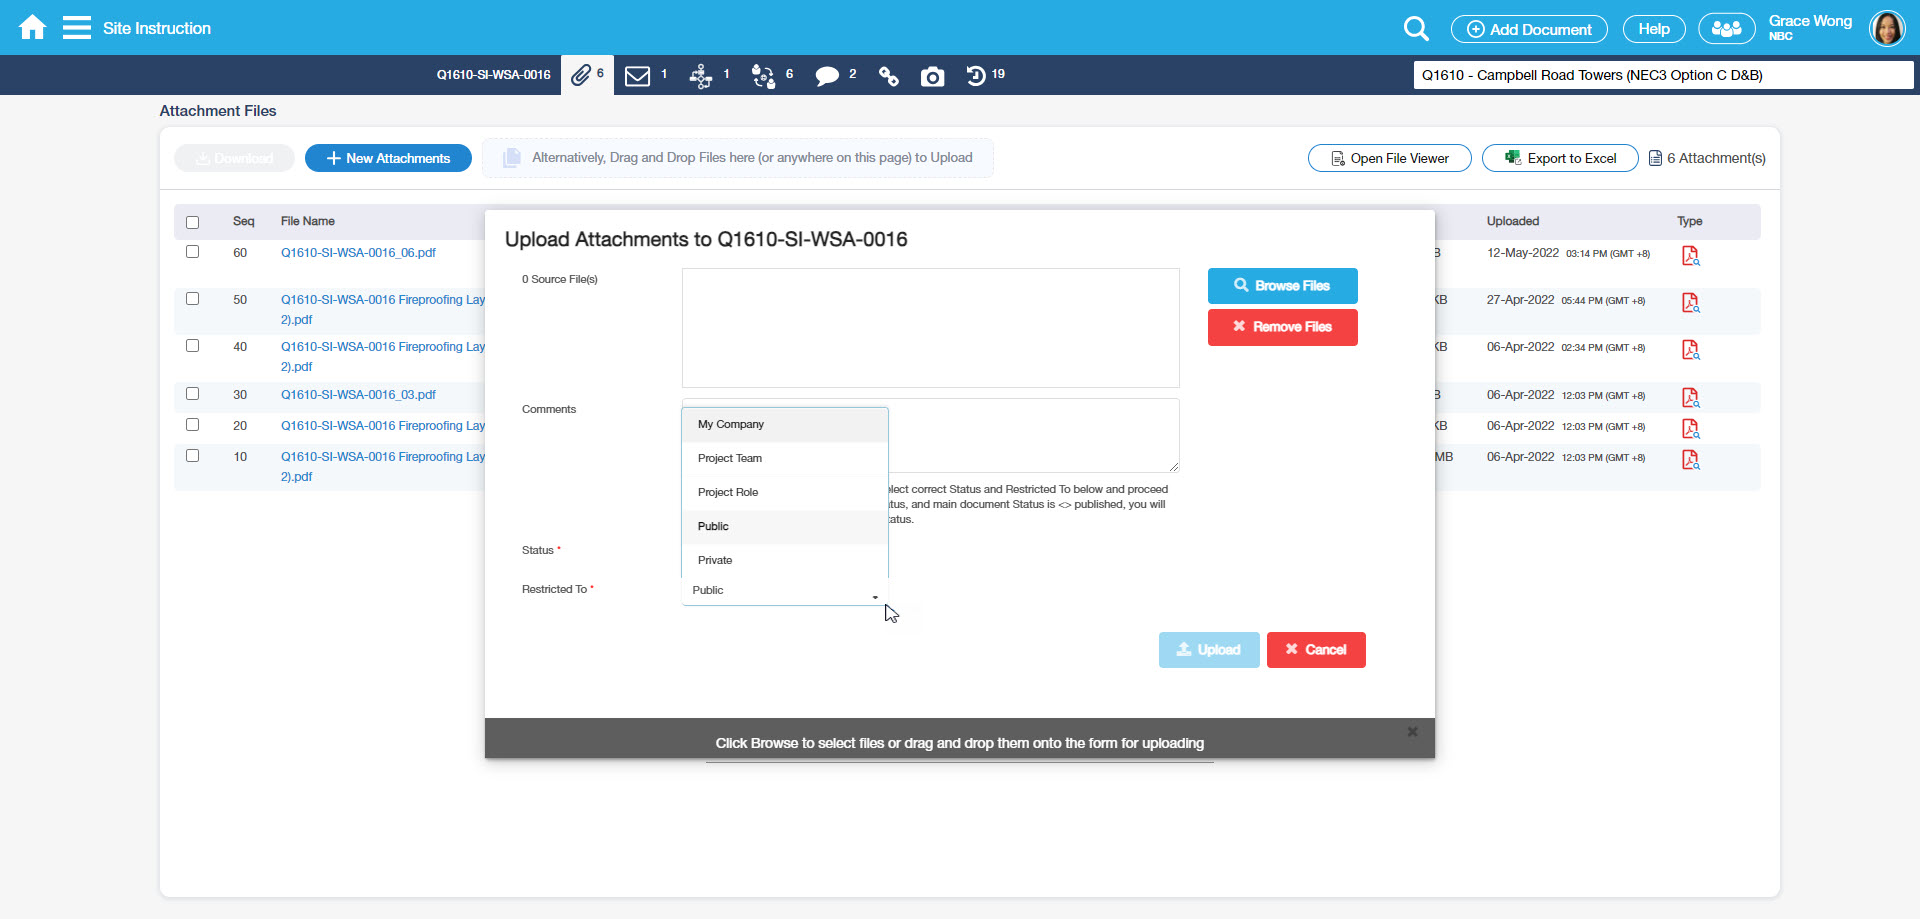
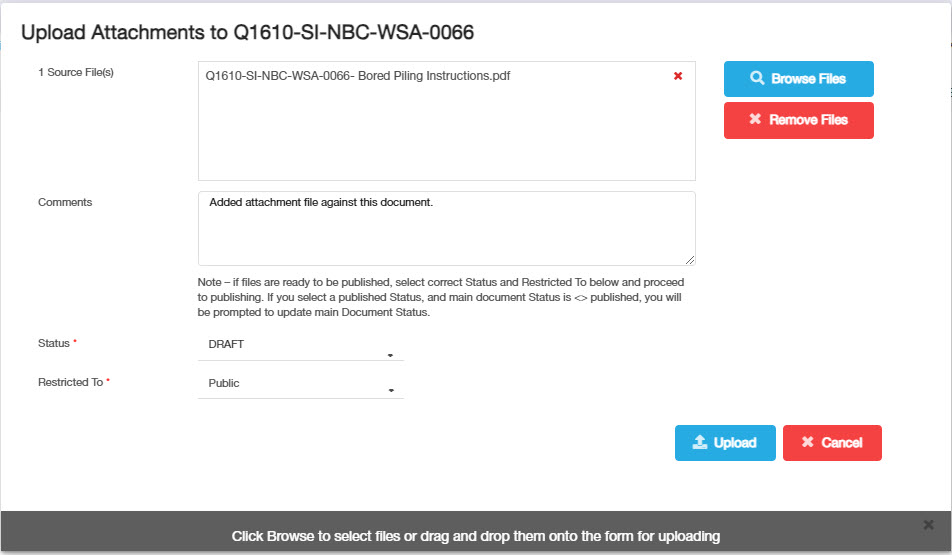
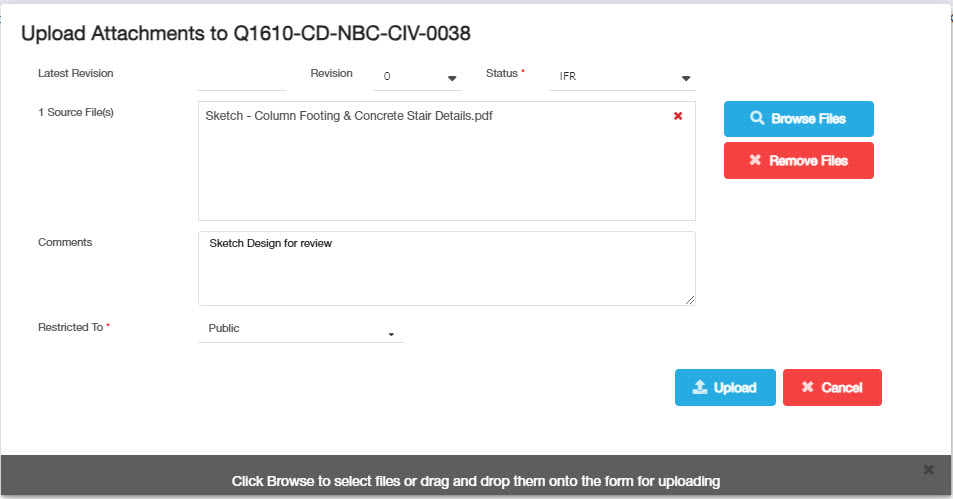
Whenever you need to upload files, there will be an Upload Attachments dialog as presented below.
Non-Revisable Upload Attachment dialog
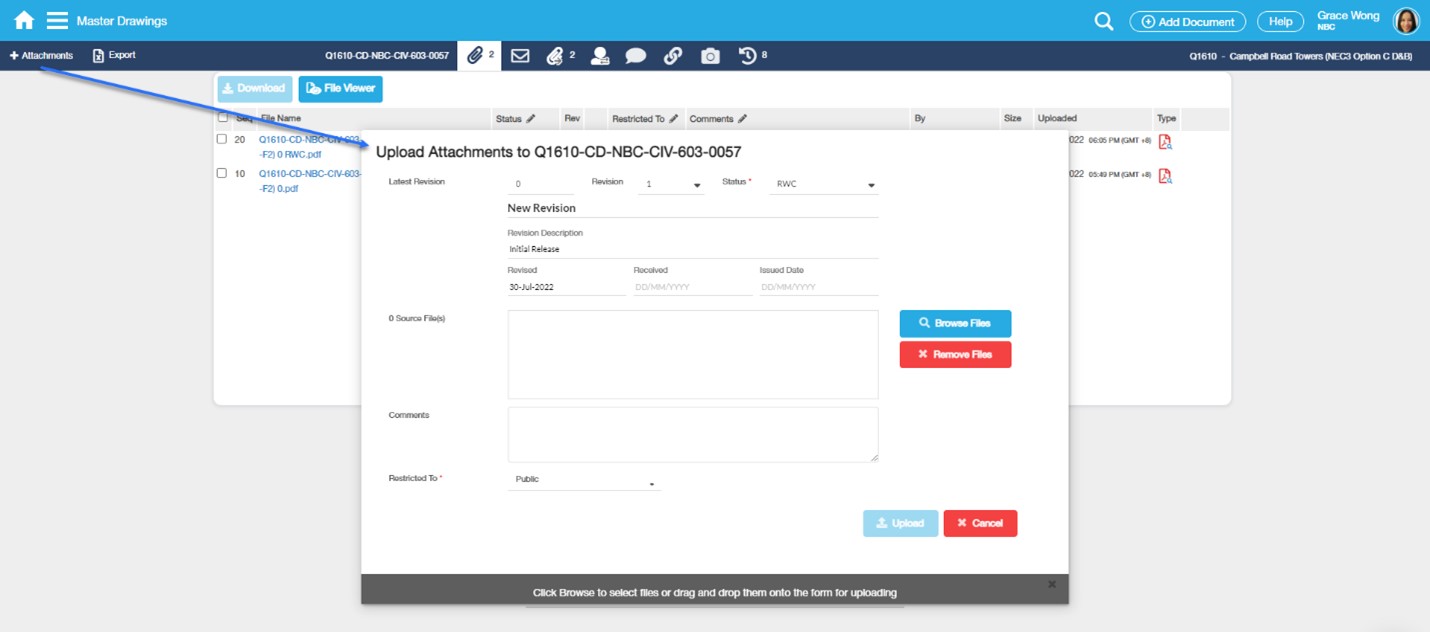
Revisable Upload Attachment dialog
Field | Description |
|---|---|
| Latest Revision No. | This field defaults the current/latest Revision No. of the Document. |
| Revision No. | A drop-down list wherein you can select the correct Revision No of the file you are about to upload. |
Upload listing area | This area lists the files currently selected for upload. |
Browse Files button | This is used to Search for and select the files that you wish to upload |
| Remove Files button | This will remove the file(s) that are ticked in the upload listing area |
| Comments | This enables you to enter a comment describing the files being uploaded |
| Status | Attachment Status. This is also a mandatory field and can select a value from the dropdown list. |
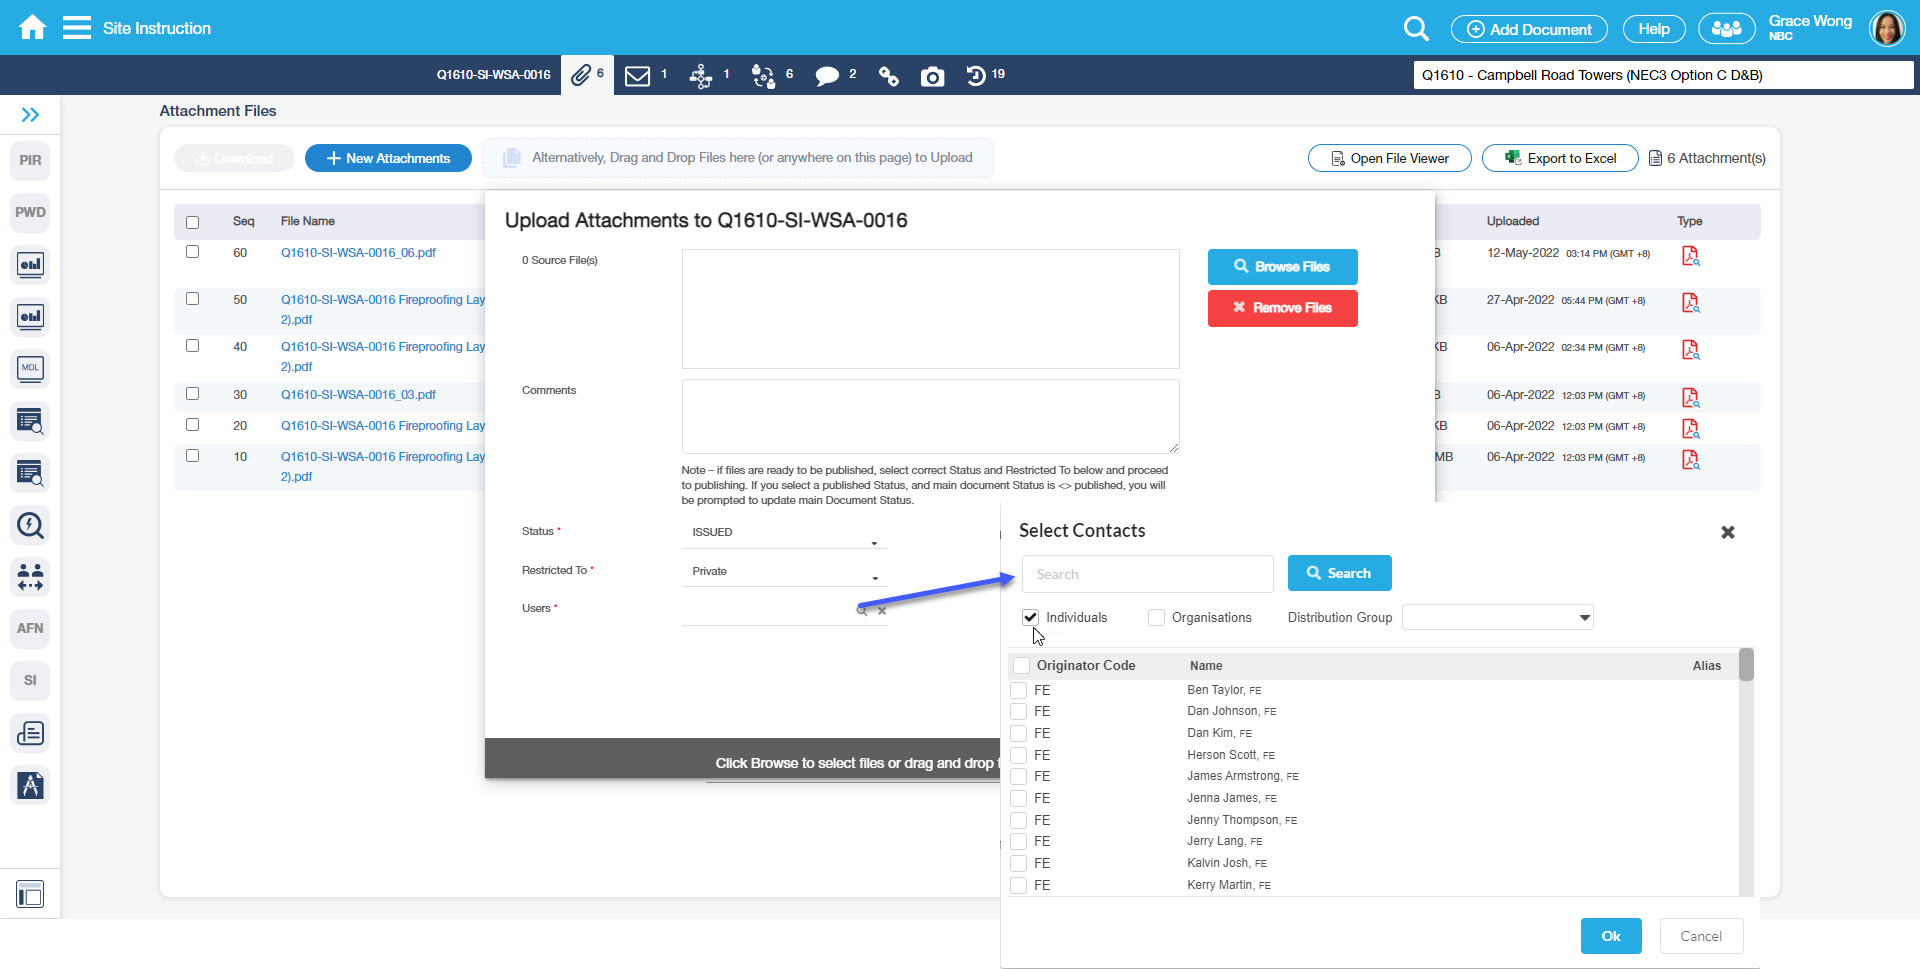
| Restricted To | When you want to restrict viewing and access to the attachment, the Restricted To field can be used to search for the User to allow access to the file(s):
|
| Upload button | Click to commence uploading the file(s) |
| Cancel button | Click to cancel the upload and close the Upload Files Dialog |
Superseded
Superseded logic = IF Status on Attachment Uploaded has an attribute constant of (IFC or Approved) AND this Status exists on a previous Attachment THEN mark the previous Attachment as Superseded (cmAttachment.IsSuperseded = 1)
How Do I?
How Do I Upload Attachments?
You can upload files using two methods:
A - For Non-Revisable Register Document |
|---|
File Upload using the '+ Attachments' option |
|
1. Select + Attachments button on the Action Bar; information in the nag, located at the bottom of the Upload Attachment dialog, will be provided to the User on what you need to do. |
| 2. Search files by clicking the Browse Files button then select the file to be uploaded. Multiple files can also be uploaded by selecting two or more files on the Upload listing area. |
| 3. On the Comments field, add notes regarding the attachments |
| 4. Assign Contact on the Restricted To field (as needed). |
| 5. Click Upload to continue the upload process. After upload, the attachments are displayed and sorted in descending order i.e. the most recently uploaded attachment is displayed on top. |
| Note: A Register may have a configured maximum file size to limit the file size that is being uploaded. The standard maximum file size is 100 MB. If you attempt to upload a file that exceeds the configured limit, a warning message will appear prompting you that a file cannot exceed the set max file upload size |
B - For Revisable Register Document |
|
|
2. Revision number could be the same as the latest document revision number; could be higher or even lower depending on the Task Permission assigned to you (normal case is higher Revision). For Revisable Documents, the following functions are applied:
|
| Note: For a sample of Revisable Document, please go to the link /wiki/spaces/AHG/pages/1340538932 |
How Do I Upload using Drag and Drop Function?
Upload by using the Drag and Drop function |
|---|
1. You can also upload the files by 'drag and drop' directly from the desktop onto the Attachments tab or on the Upload Attachments dialog. |
| 2. Bear in mind that this function will work, in wherever tab you are against the Document form. |
How Do I Download Single Attachment?
1. Download an Attachment |
|---|
|
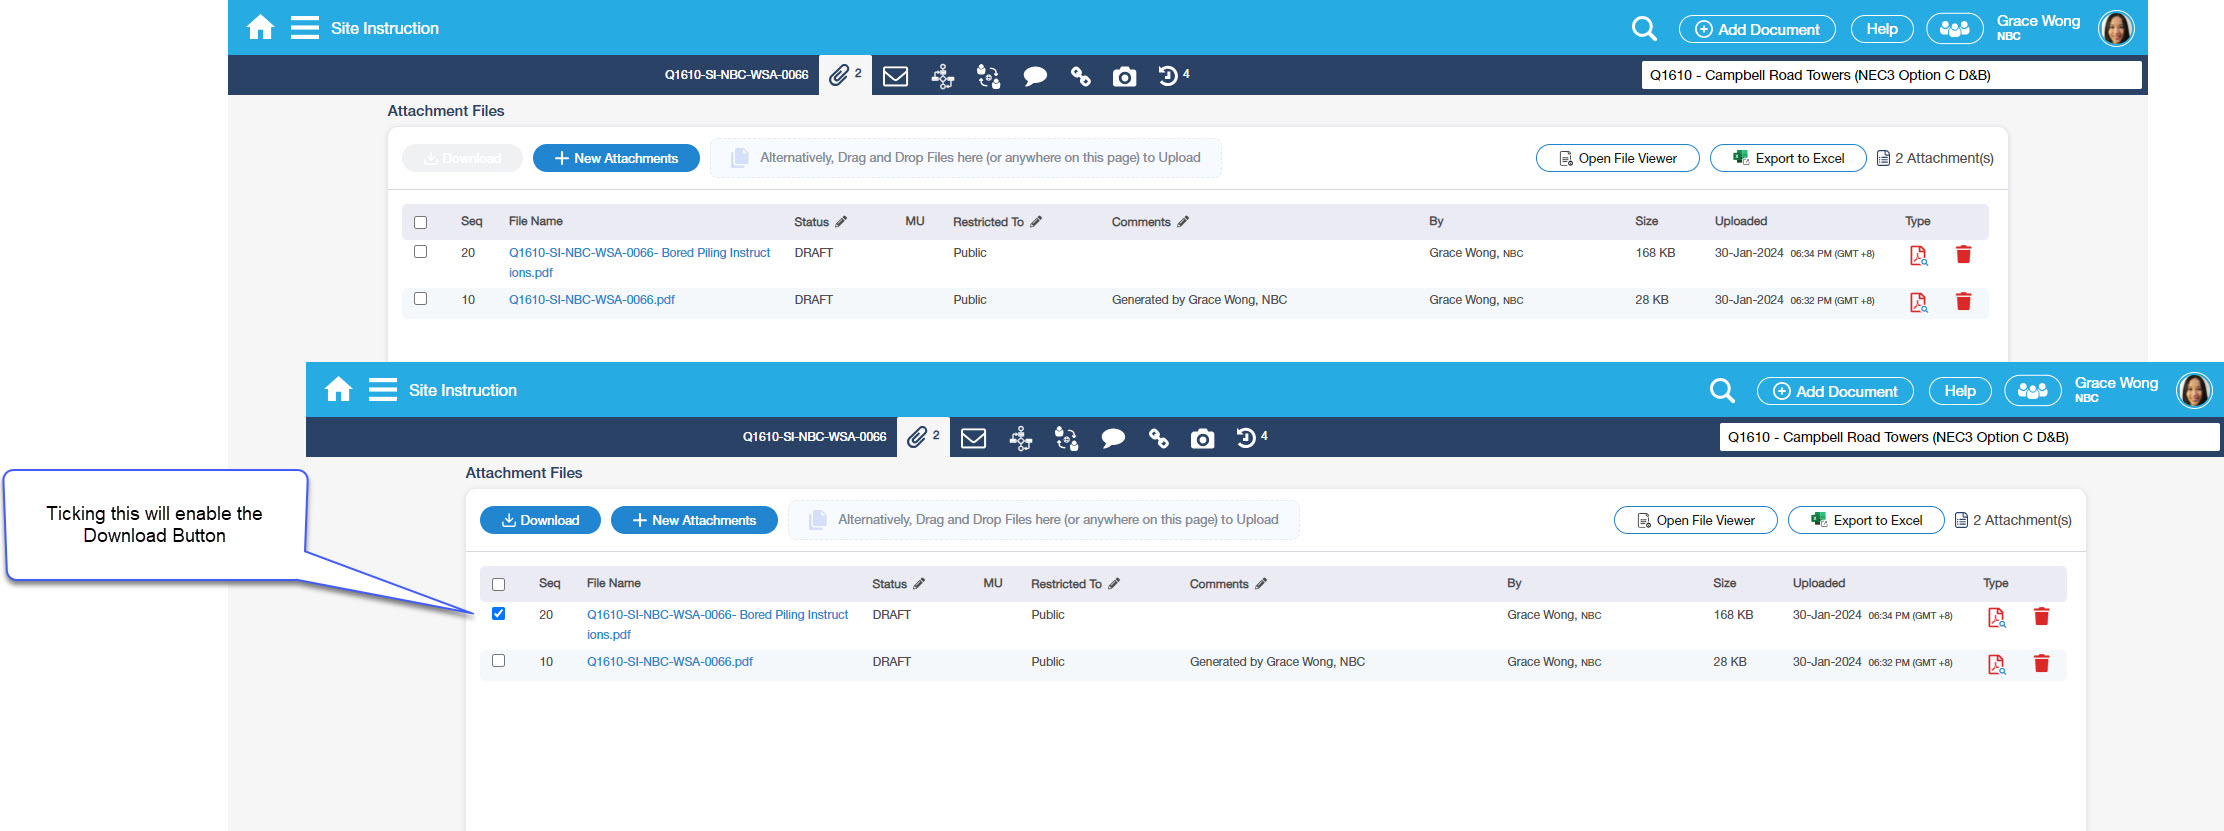
| To download one attachment, download file by ticking checkbox beside the attachment files and click Download button. An option to open the file or save it will be presented. |
How Do I Download Multiple Attachments?
1. Select the Files that wish to be downloaded |
|---|
|
| To download multiple files at the same time, tick the check-boxes beside the selected files or click the top checkbox on the header column. |
2. Click the Download button to download multiple and selected attachments. |
|
| Multiple attachments will be downloaded into zip files. |
How Do I Edit Uploaded Files?
1. Edit an Attachment file |
|---|
|
| 1. A pencil icon is available in columns with edit functions. These columns are - Status, Restricted To, and Comments. |
2. When editing an attachment, you can never overwrite an existing attachment file; as stated above, you can only edit the values for Status, Restricted To, and Comments. |
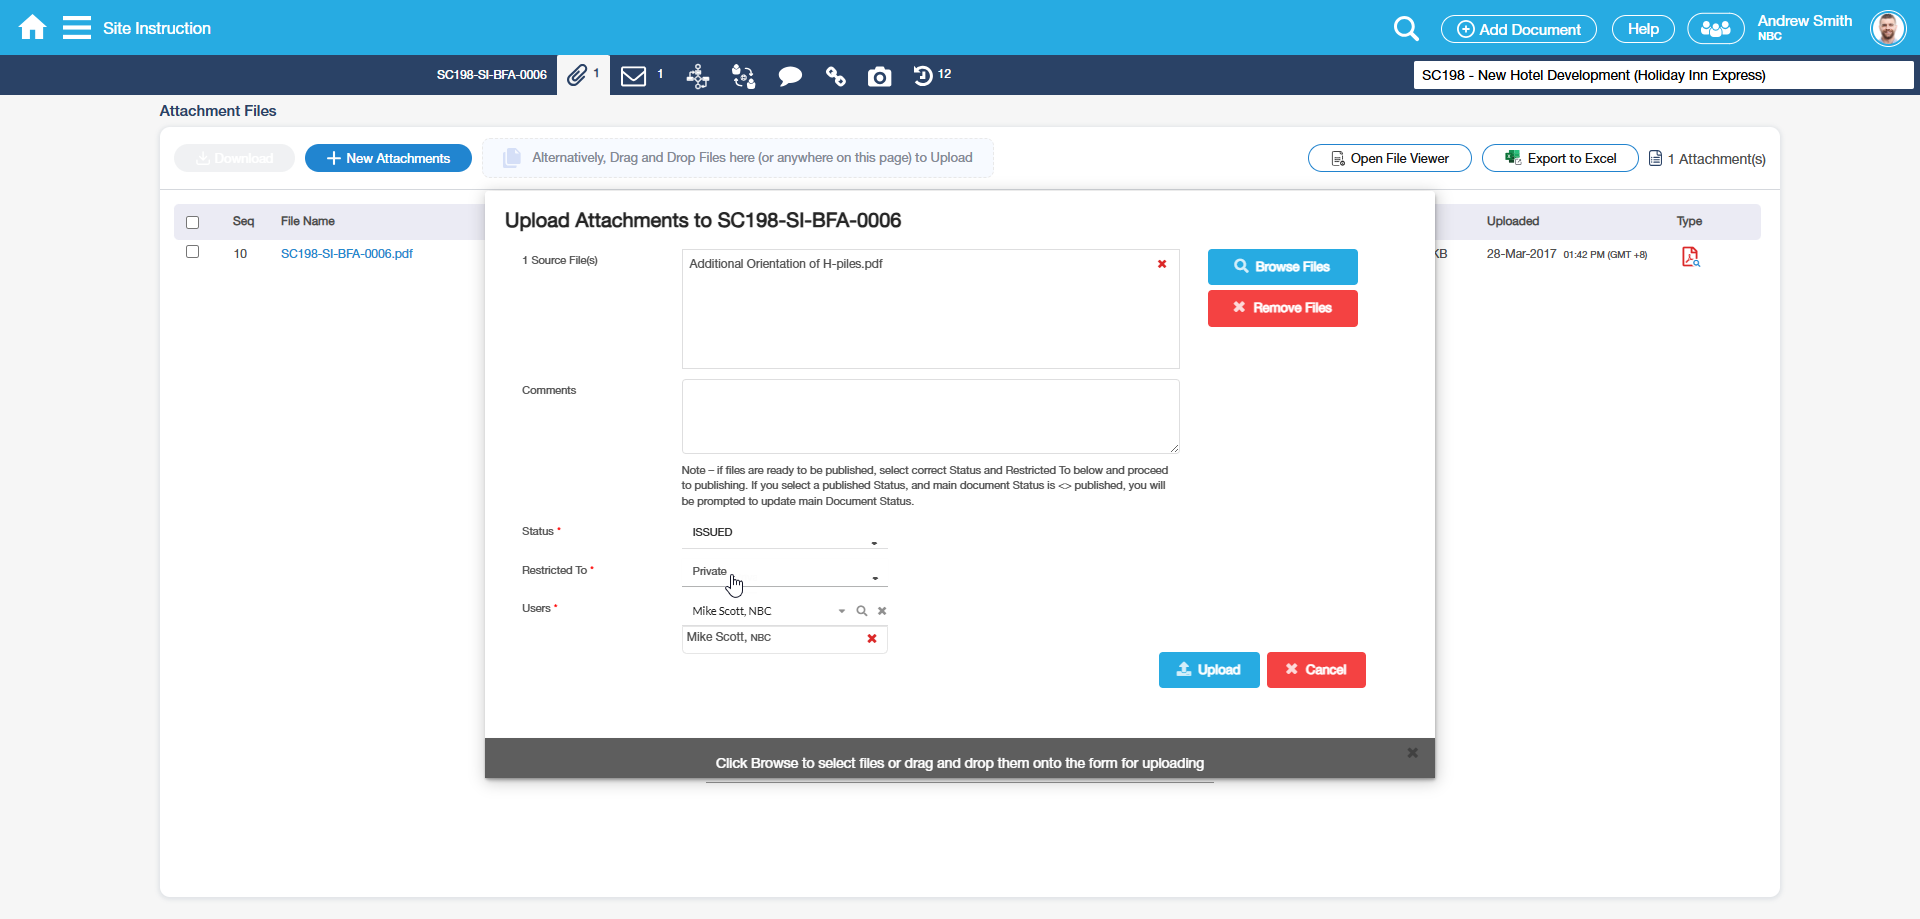
How Do I Restrict an Attachment?
|
|---|
|
|
2. Restrict Users field will only display when the Private option is selected (see sample below).
|
| 3. Only those Contacts assigned on the Restricted To field are the ones allowed to see the Attachment record. |
How Do I Supersede an Attachment?
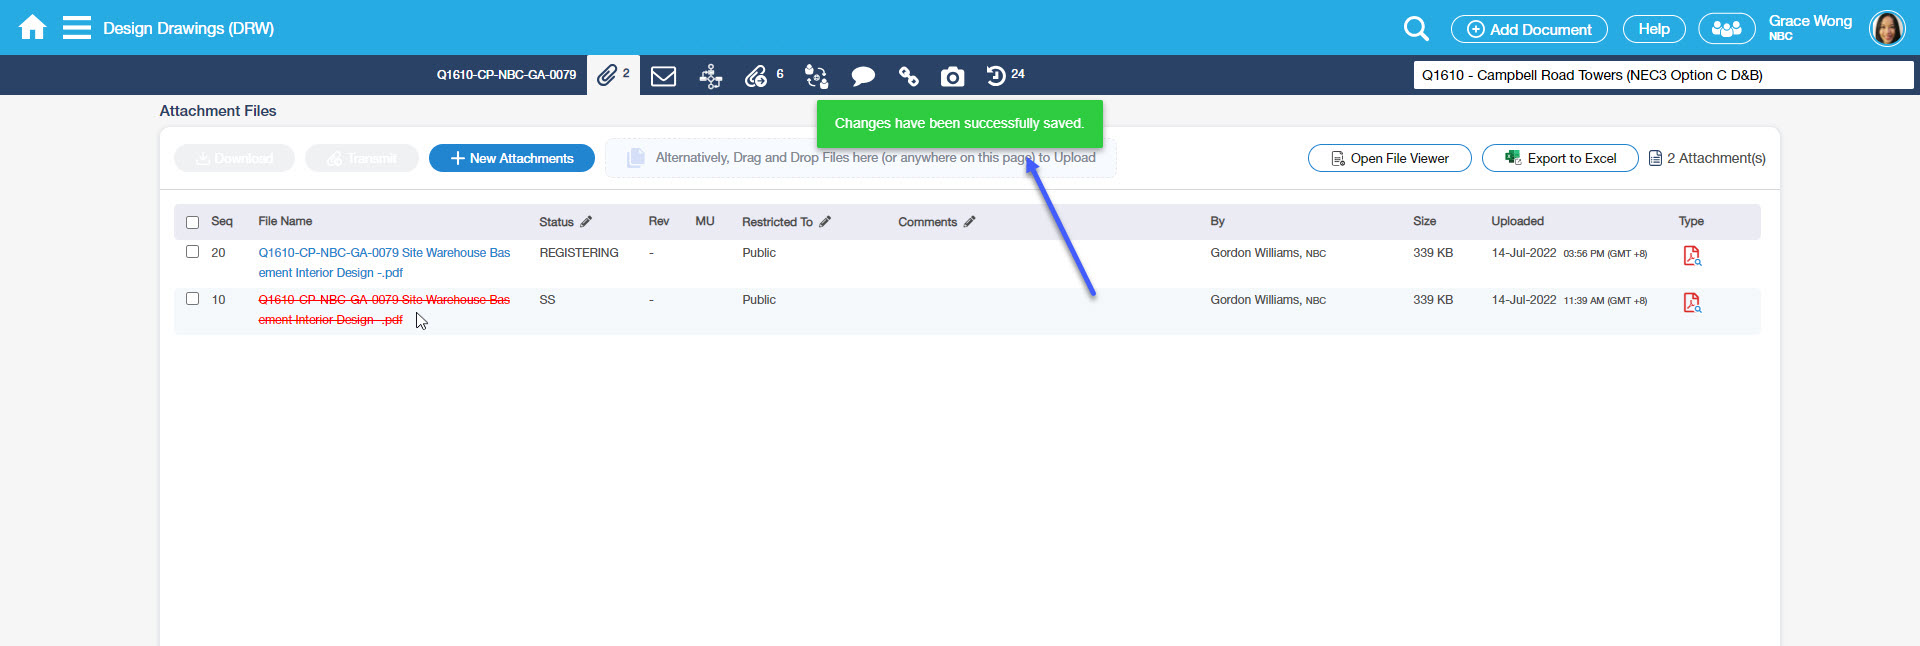
When superseding an attachment, you must manually change the Attachment Status by selecting Superseded. The selected attachment will be marked 'superseded' in red and strike-through.
|
|---|
|
| The selected attachment will be marked as superseded (red strike-through). |
How Do I Markup in Document?
|
|---|
|
Note that for an attachment to be marked up, it must be an image or a PDF file. |
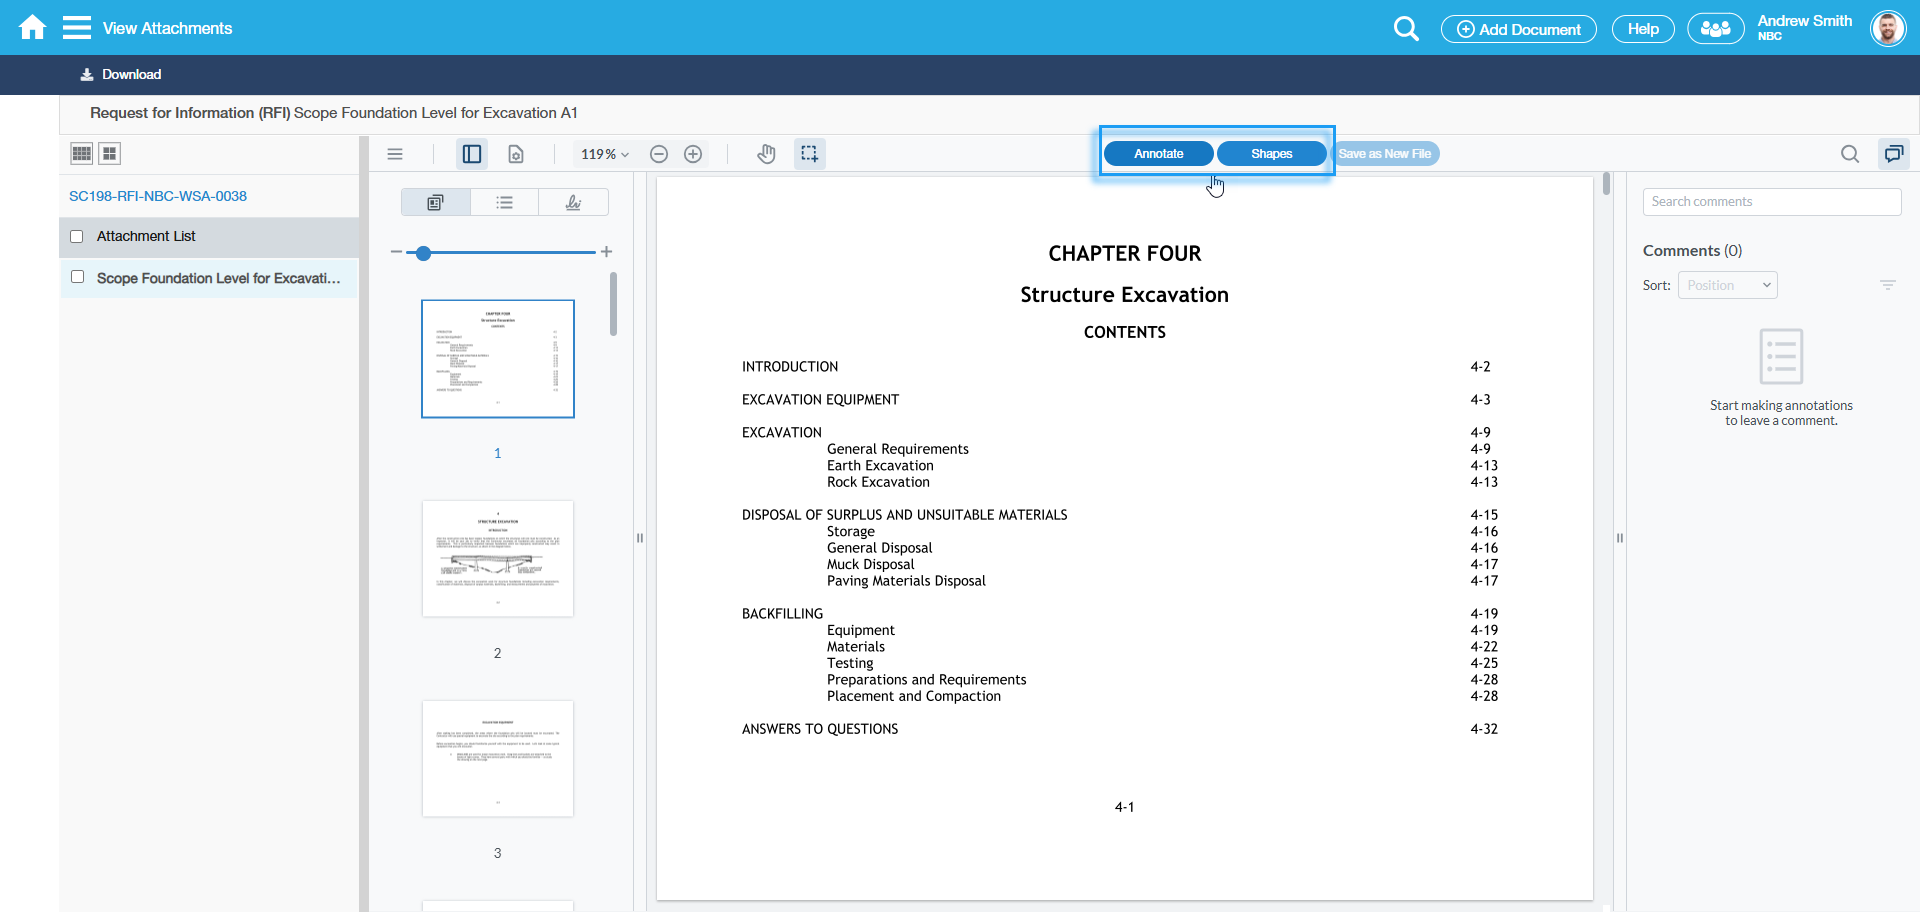
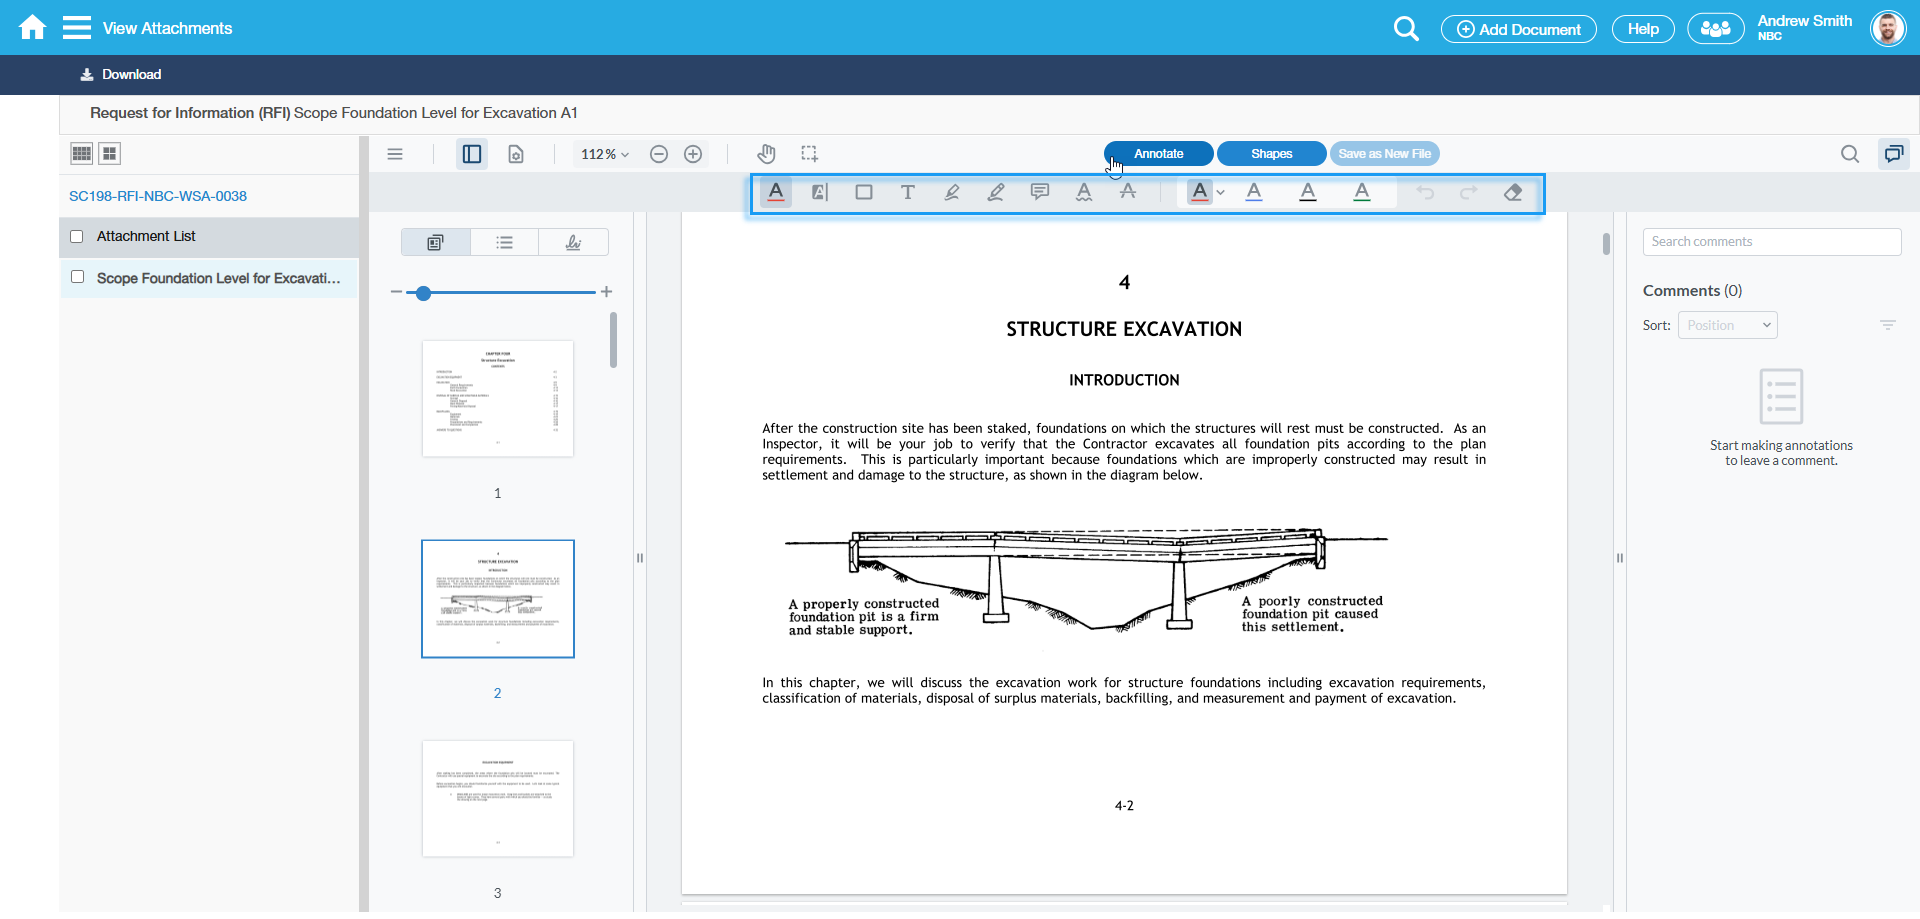
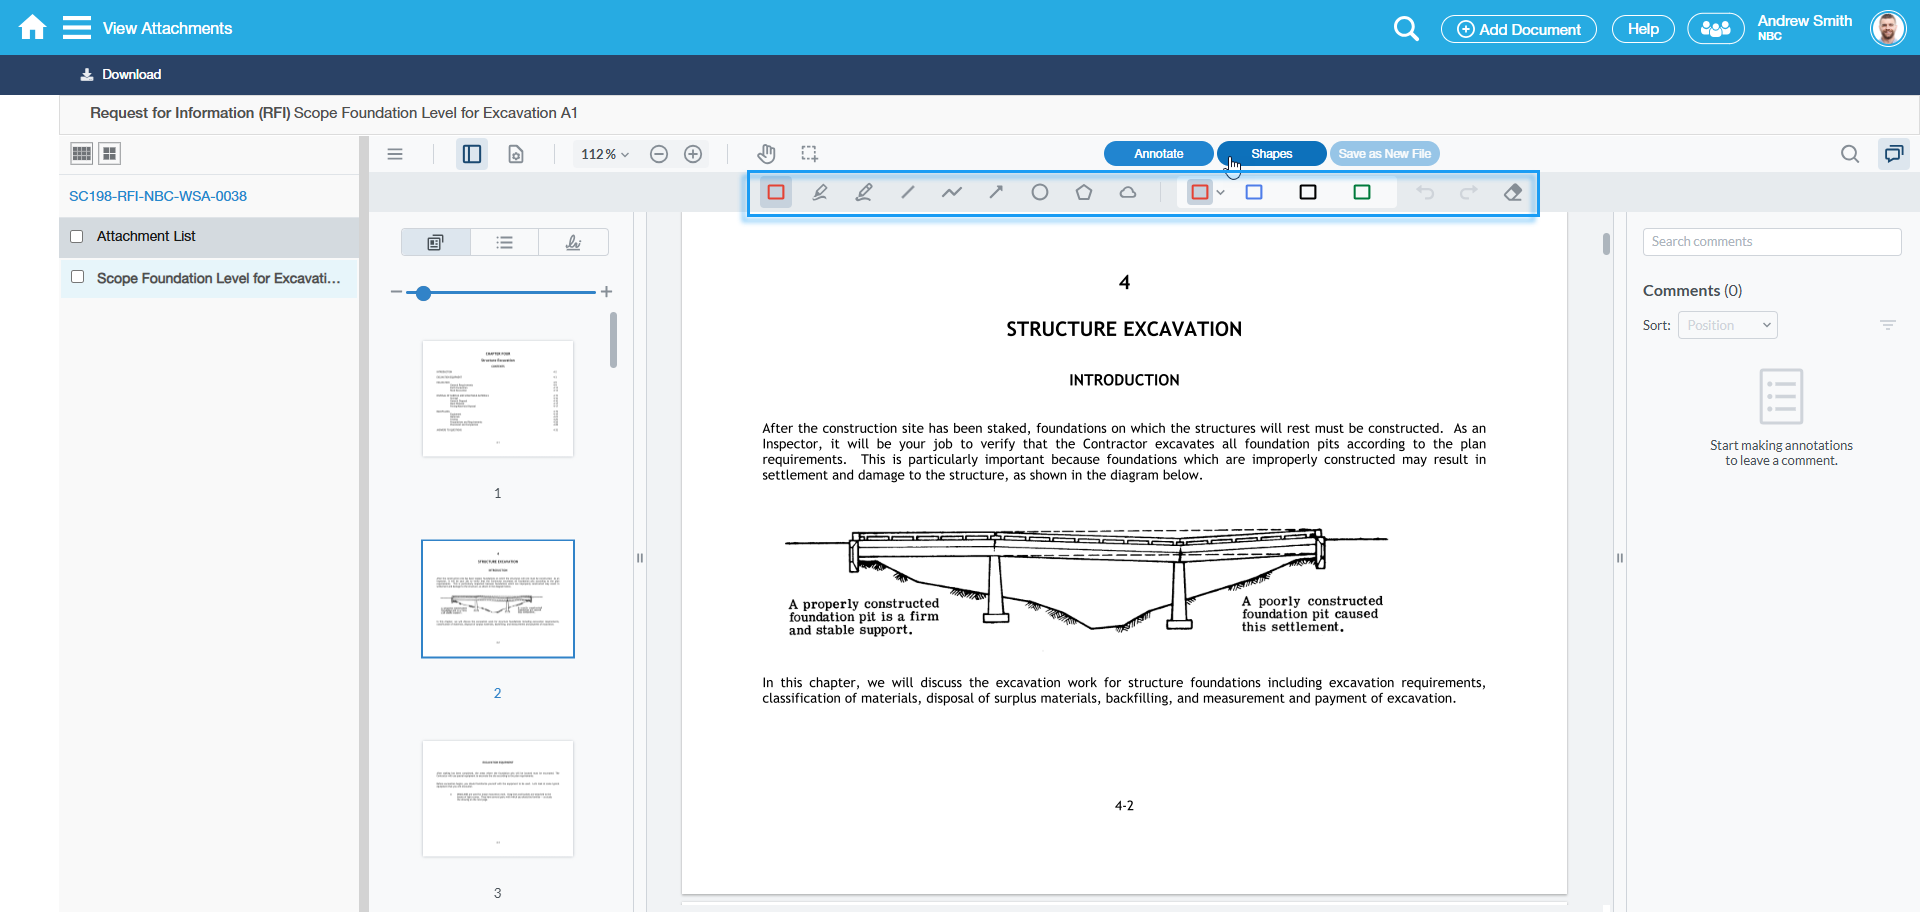
2. Upon open in 'View Attachment' page, select on button in 'Annotate & Shape' on doing the markups to used. |
|
For button Annotate markup toolbar.
For button Shape markup toolbar.
|
|
Save the markup and after closing the markup screen, you will be directed back to the Attachments tab. An attachment row will be automatically added with a Comments. Note: Comment would vary depending on if default is used or change the default comment. |
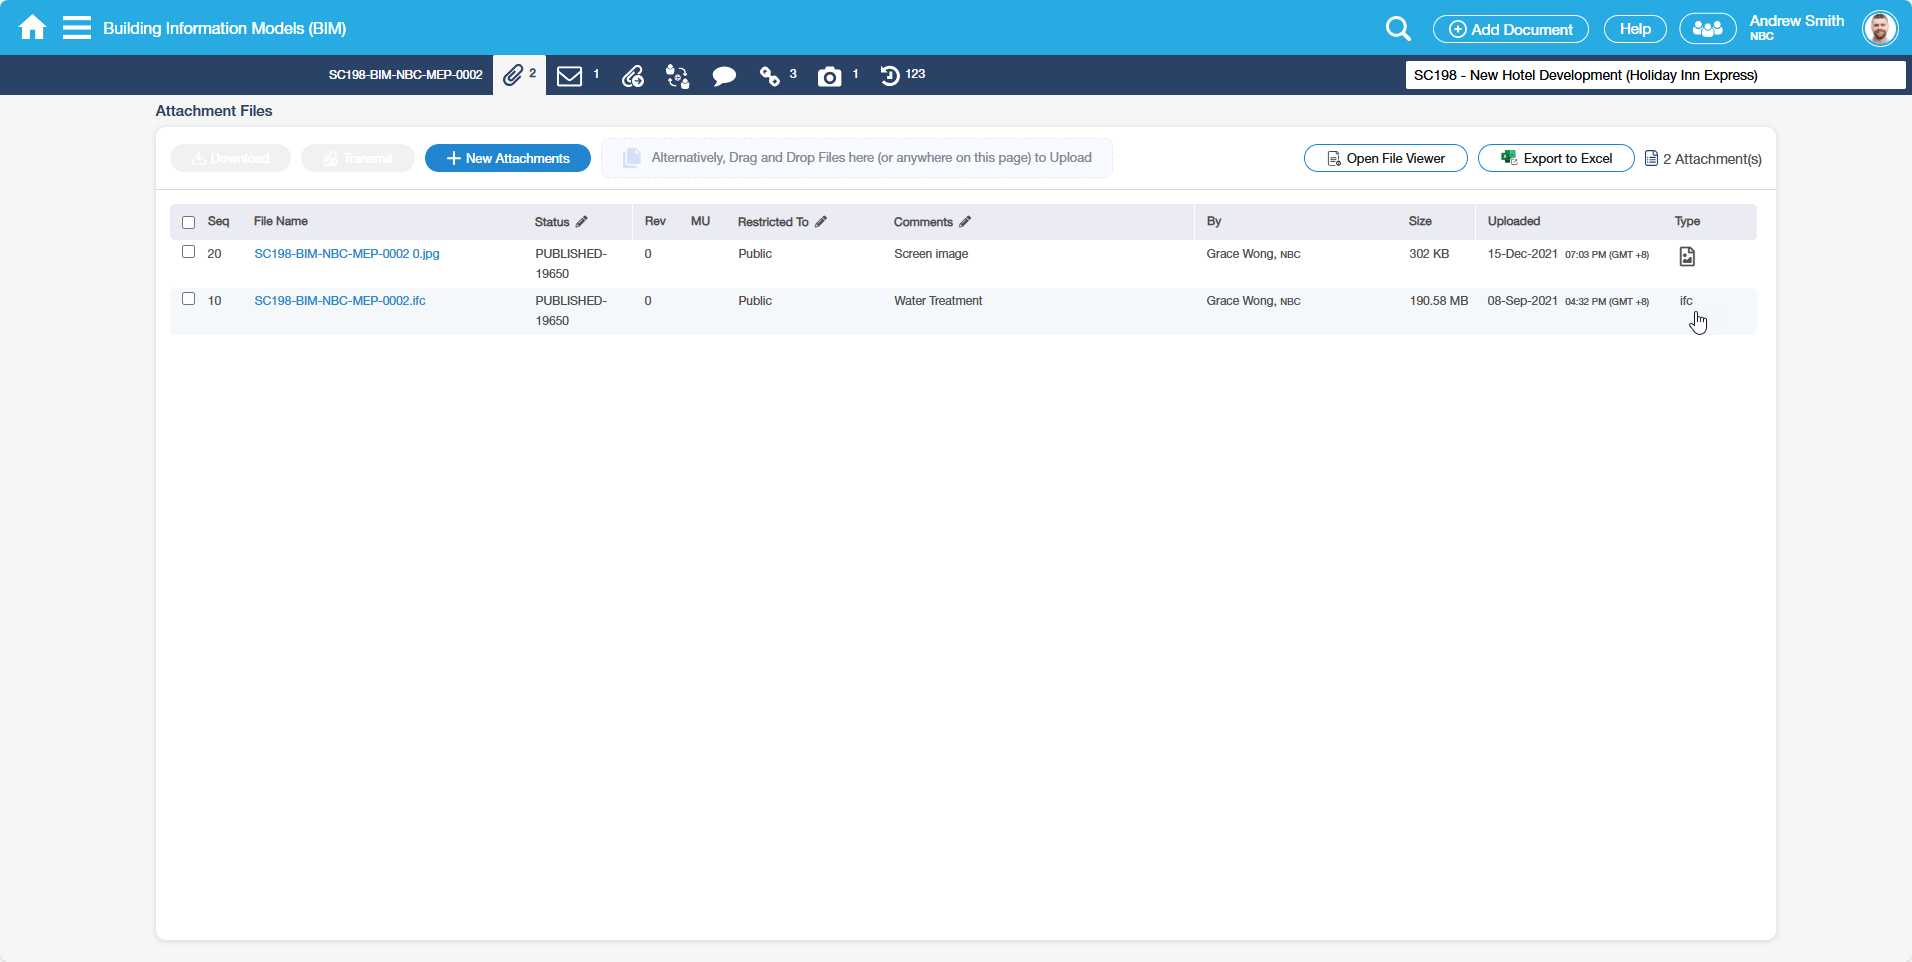
How Do I view BIM files with International Foundation Classes (IFC) file type?
|
|---|
|
| It is important to note that the .ifc file can be viewed by Enterprise BIM viewer. |
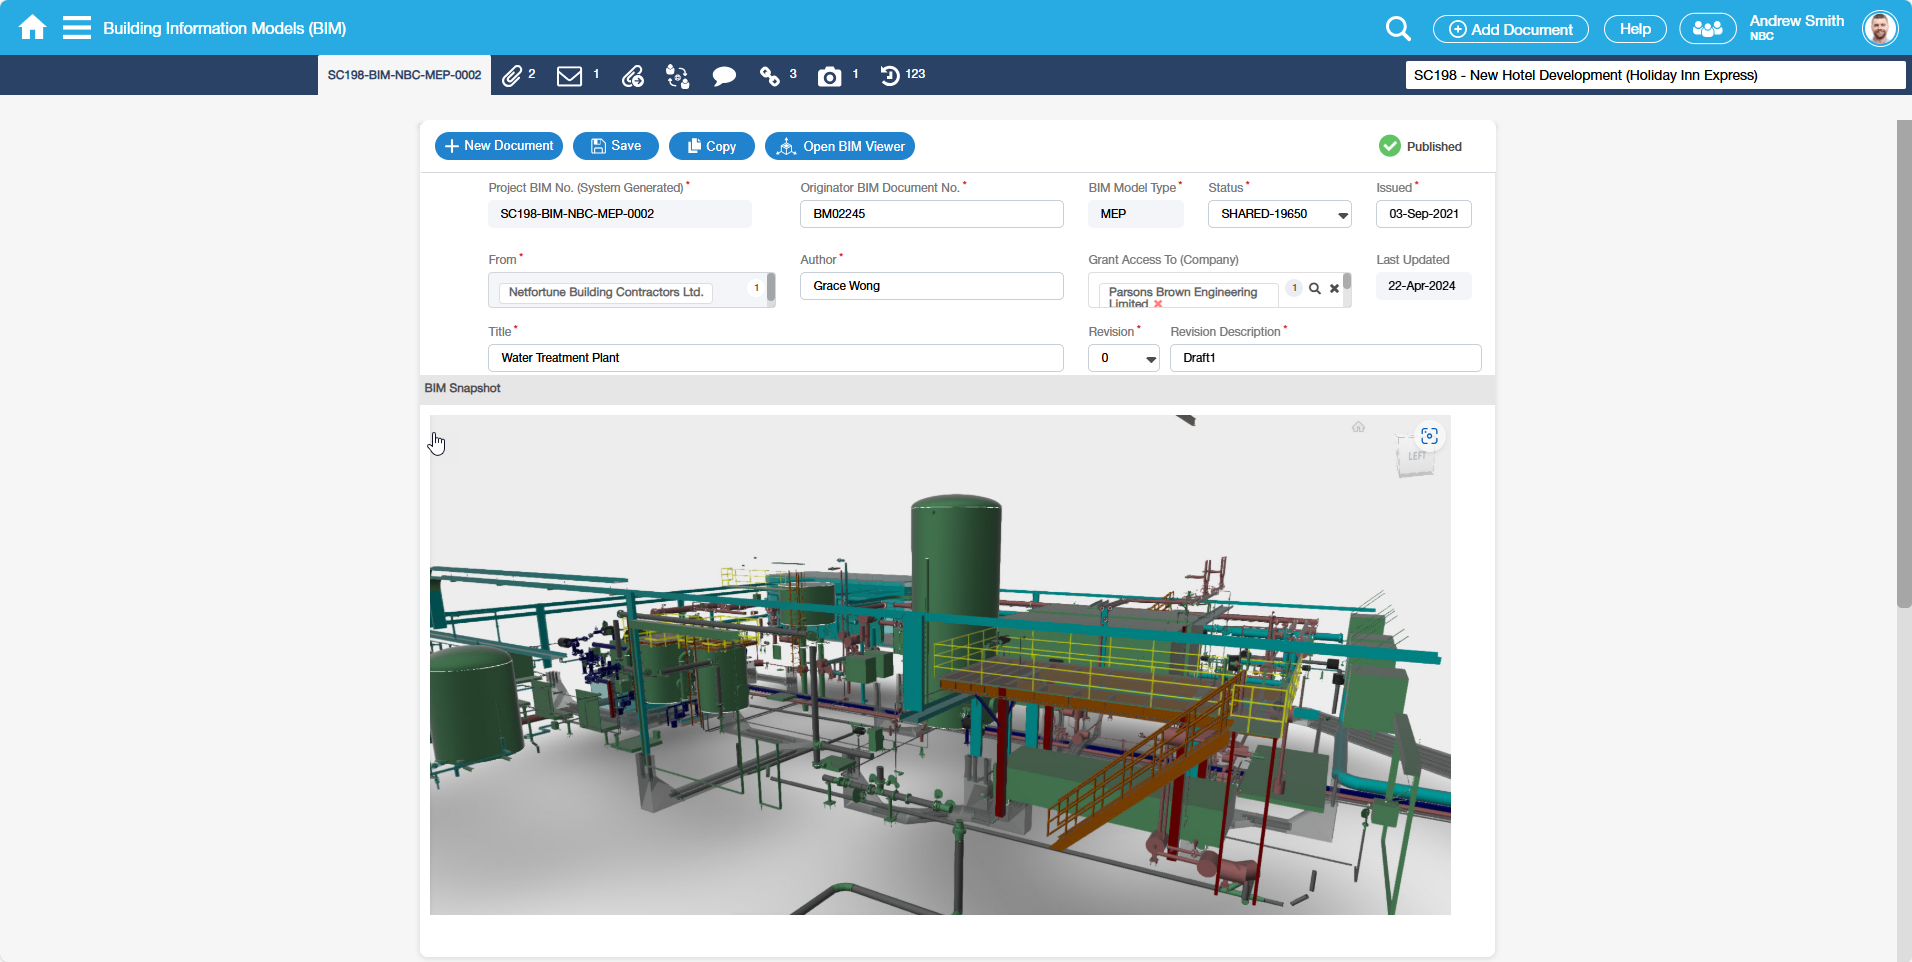
2. Upon upload BIM file it will in display in detail tab as BIM Snapshot Select the BIM file and click from the drop-down selection the BIM Viewer option. |
|
| 3. View the BIM File. |
|
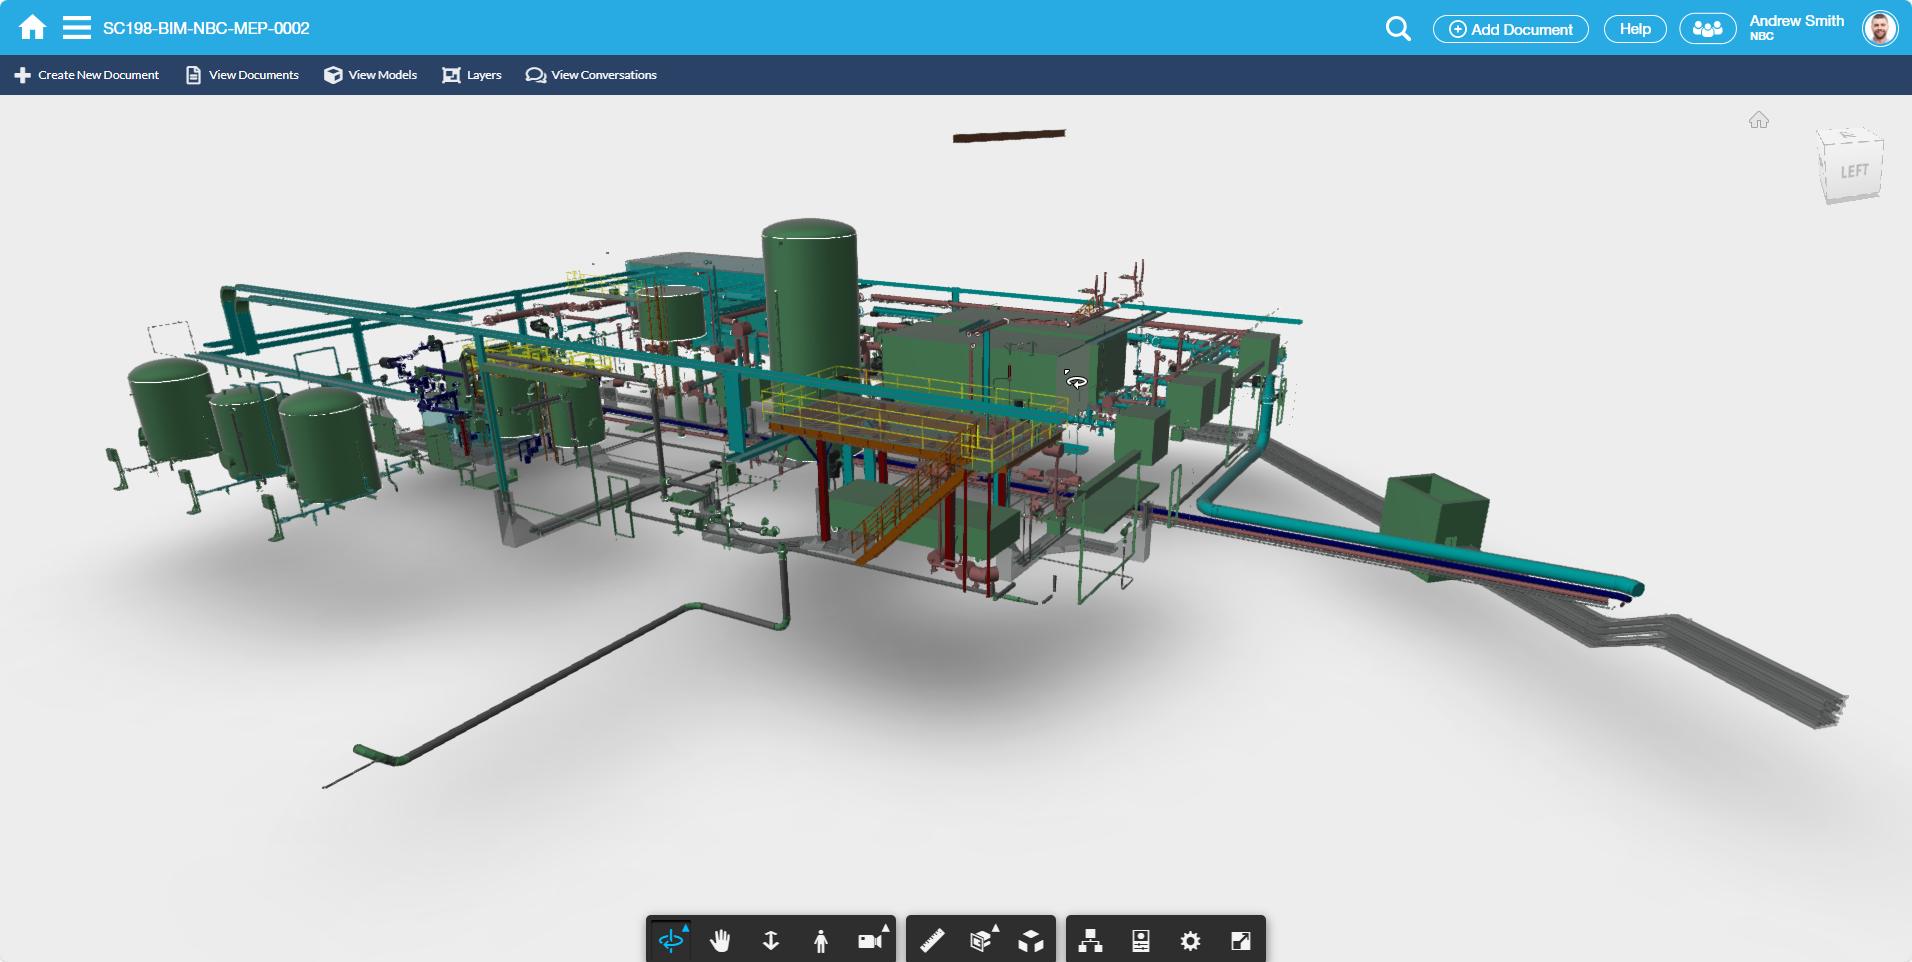
Rotate the image or use the buttons in the Action bar to view in different angles. You can select a section of the model, mark it up and then raise an RFI all from within the BIM Viewer. The RFI document will be automatically cross-referenced to the BIM document. |
Examples of Use
Sample Attachment Restricted to a Contact (Restricted To = Private)
